

Stretch velvet is a bear in the knit world for the handling, but the upsides are so worth the extra effort.
It’s so luxurious against your skin, and it yields even the simplest garment positively fancy instantly.
It’s so nice in fact, that it’s worth wrestling with the slipping, the longer cutting process, and the careful pressing it requires to get to the end.
Without a doubt it’s a crabby, demanding fabric, but I hope here to show you how to sew stretch velvet without fear. We’ll talk about some basics for cutting stretch velvet, what tools are best for it, how to handle marking and pressing plus I’ll share some patterns that would do well for stretch velvet.

Table of Contents
About the nap on stretch velvet
The biggest thing you need to know about stretch velvet is that it’s a napped fabric that’s also directional. That means it has a raised surface and it looks different depending on which way that nap is sitting.
The light will sink into the fabric one way and reflect off it from the opposite direction.

You can see that really well on my ill-cut dress here. The bodice is a different color than the skirt. It was a refashion and I did it to use the yardage that I had.
My client still loved it, but it’s a good illustration of how the same fabric can look so dramatically different.
Because of the nap, when you’re planning a project for stretch velvet, buy extra fabric so that you can cut it all one direction. A extra 1/4-1/2 yard will probably do you good.
You can cut with the nap running either direction, just be consistent.
Which pattern styles do best for stretch velvet
Any kind of velvet needs extra special handling that’s going to up your time to get through any seam.
Do yourself a solid and pick a really simple pattern. Princess seams are possible in stretch velvet, though they’re tricky to press.
Basic tees, fit and flare dresses, and leggings do well here. Also big swishy skirts and cardigans could work.
Because stretch velvet is drapey in addition to being stretchy, ruching and twist tops and dresses look really cool in stretch velvet.

And don’t forget colorblocking. It can be a dramatic way to mix up stretch velvets.
How to cut stretch velvet
Now that you’ve got the idea of the nap in your head, let’s talk about cutting stretch velvet.
Laying out the stretch velvet
Lay the fabric right side down. It doesn’t slip on my large rotary cutting mat. If you find your velvet shifting on you, set down a layer of tissue paper first, then the velvet.
Cut single layer. I know, it’s a mega pain, but velvet shifts around too much and it’s also too bulky to get an accurate fold.
If you don’t have full size pattern pieces, make them by tracing a full-size piece onto tissue paper or your favorite pattern paper.
Use pattern weights too.
Should I use scissors or a rotary cutter for stretch velvet?
You can go either way for cutting stretch velvet, but you might find that your scissors slip while you’re cutting.
I have a pair of Kai micro-serrated edge shears that slice right through the stretch velvet. The serrated edges grip right onto the slippy velvet without any fuss.

If you don’t have a pair of serrated edge shears, definitely go with a rotary blade. You’ll get clean cuts with not a lot of effort.
Marking stretch velvet
Avoid marking with anything that’s going to crush the nap of your stretch velvet. So, no tracing wheels or chalk wheels.
Air soluble pens on the wrong side, tailor’s tacks, or outward notches are good.

For marking darts, make tiny snips at the dart legs and mark the point with 1 pin. You’ll have to sew these first because the pins will want to slip out, but it’s an accurate way to mark the points accurately without damage.
Interfacing and stabilizing stretch velvet
Avoid fusible interfacing for stretch velvet. If you must use interfacing, my sew sister Carrie Cunningham recommends a sew-in interfacing like organza on the bias only.

Carrie also recommends sewing in clear elastic on shoulder seams. Stretch velvet has a lot of weight to it, and clear elastic will go a long way in helping support those shoulder seams!
How to sew stretch velvet
Now that you’ve cut and marked everything, it’s time to sew.
You’ll find that stretch velvet will want to slip on you, but it’s a weird slipping. It’s more like a shifting as the layers slide against each other.
To keep this under control, you need to hand baste each seam.

Fold the pieces wrong sides together and align the edges. Use a contrast thread (I like silk!) and run long basting stitches down the seam. A straight running stitch is usually good.
If the fabric is really shifting on you, try diagonal stitches.
Needles for stretch velvet
With your basted seams, use a 75/11 stretch needle or a ballpoint needle + a narrow zigzag to sew all your seams.
Conquer all your sewing fears

If you’re wanting to learn to sew and looking for an online class that combines a lot of the ways of learning we’ve been talking about here, Self-Reliant Sewing might be for you.
I created this class with sequential, clear goals for every project. You won’t be left to wonder what you’re supposed to be learning. We’ll build a base of information that’ll help you make thoughtful choices as you grow in your sewing journey.
How to press stretch velvet without destroying it
Pressing velvet can lead to you permanently flattening the nap.
The safest way to press any kind of velvet is on a velvet board, but those guys are expensive. Like $150 expensive for what’s really a unitasker in your sewing room.
But you don’t have to plunk down that much money to press velvet carefully. Just save a piece of your velvet and use it as a press cloth.
Hover your iron over the velvet, never let it touch the fabric. Use the iron’s seam to press and use your hands lightly to hold in the steam while it cools.
Lining and seam finishes for stretch velvet
Velvet has such a luxury feel to it, I’d go for lining any day. A lightweight mesh or tricot knit would be great here.
But that being said, if you want to skip the lining, leave the seams raw.
You can also finish seams with a serger. Make sure you sew the seam and just finish with a serger. You definitely want that control when you sew the seam. Picking out serger stitches on velvet is not how you want to spend your Tuesday!
How to hem stretch velvet
Velvet + topstitching = sad face. Very very sad face because that topstitching will flatten out all that glorious nap.

Instead, opt for either a blind hem, or hand stitch a hem.
You can serge the raw edge and steam up the hem into place. Hand stitch the hem in place, grabbing 1 or 2 threads at a time for an invisible hem.
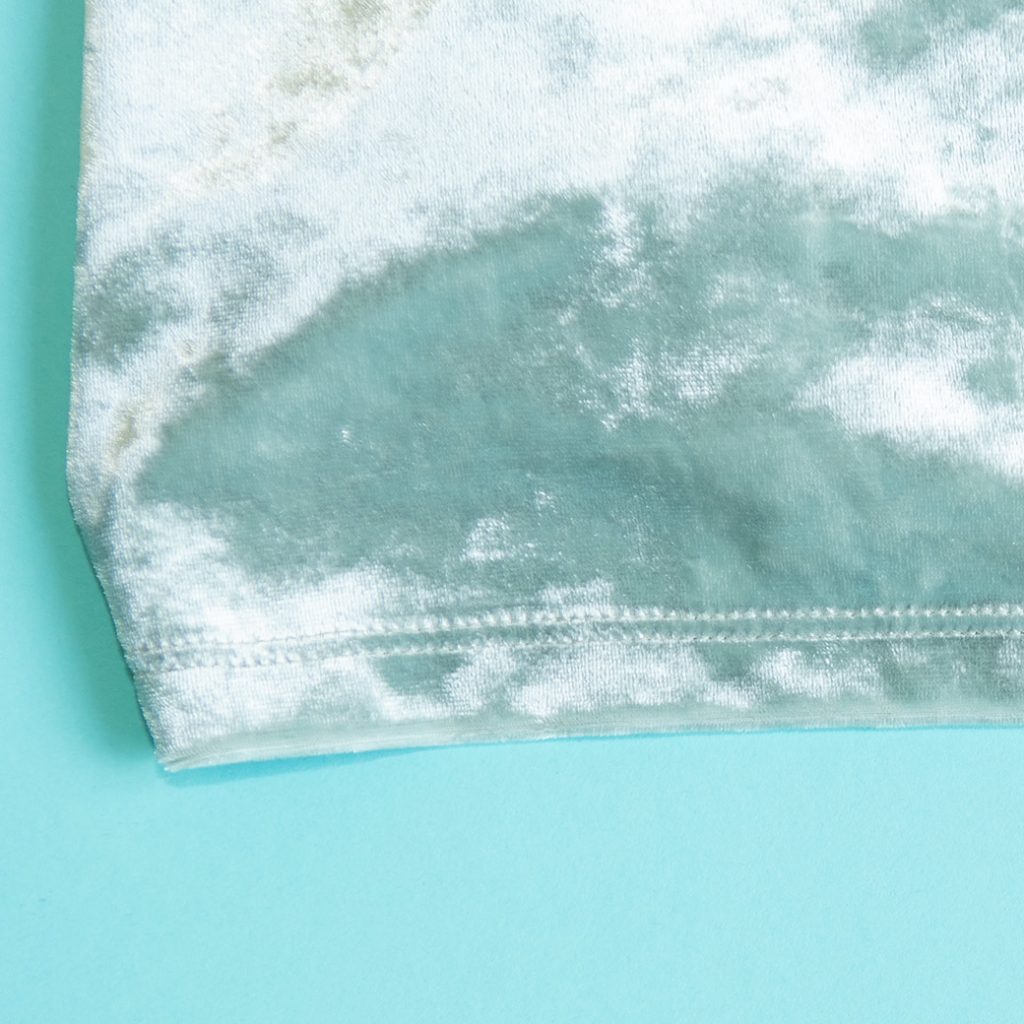
The other option is a coverstitch hem. It’s not as dressy or polished, but I’ve seen it on a number of RTW stretch velvet garments. My rule is always if RTW does it, I get a license to do so too!
Patterns that will work well for stretch velvet
Here’s some current and easy to get patterns that will work well for stretch velvet. I picked all of these based on keeping it simple Hopefully you’ll find one you’ll like!
Easy DIY accessories for stretch velvet
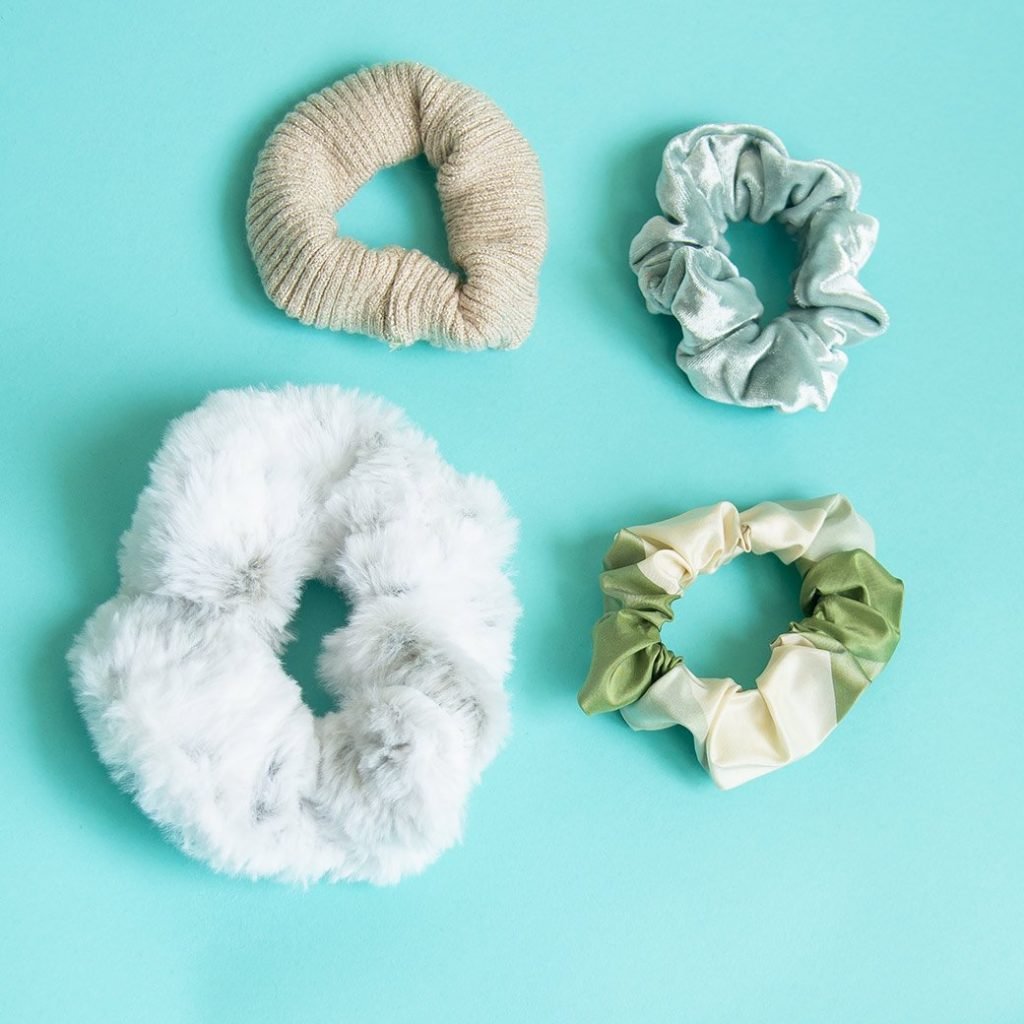
How to sew a scrunchie 3 ways
Easy way to practice sewing with stretch velvet

How to make a chic velvet infinity scarf
Stay warm, look cute, up your velvet skillz
Commercial patterns that work well for stretch velvet
- Jalie Bella dress: so much swish in the full skirt!
- Jalie 2805 t-shirt: simple and lots of room to change things up
- Tilly and the Buttons’ Joni Dress from Stretch! book: one of my favorite projects from this book. Check out my other thoughts on the book in Sewing Books for Beginners That Are Actually Helpful
- Burdastyle 1-18-102 twist top: gotta love Burda for clever construction. Another good example of why sewing pattern magazines are awesome!
- McCalls 7833 dress: the ruching is everything here!
- McCalls 7864 jumpsuit: so much drama!
- True Bias Hudson pants: a different way to make up these joggers. SewSophieLynn has a good example.

Elizabeth Farr is the writer behind the Elizabeth Made This blog where she shares helpful sewing tips, step by step sewing tutorials and videos to help you explore your creativity through sewing. She has written sewing Eguides and patterns, been a featured teacher at Rebecca Page’s Sewing Summit and Jennifer Maker’s Holiday Maker Fest and her work has appeared in Seamwork and Altered Couture magazines. She also created a line of refashioned garments for SEWN Denver. When her sewing machine isn’t humming, she’s playing and teaching violin, and hanging around a good strategic board game with her husband and 4 kids.
Very helpful. Thank you.
I am a volunteer making touch quilts for Alzheimer’s clients. Some of the 6″ squares are stretch velvet which I am trying to attach to cotton squares. Do you have any suggestions as to how to keep the velvet from slipping away from the cotton. I line the edges up but it keeps escaping on me – very frustrating as I only have 1/4″ seams to work with.
Because of the nap of the velvet, it’s really difficult with those 1/4″ seams. If you sew with the velvet against the feed dogs, the feed dogs will give you a little more of a hand to help ease the fabric through. Use quilting clips (those colored plastic ones)–those are incredibly helpful with velvet. Good luck. Those will be beautiful quilts with a wonderful feel to them that’ll definitely bring some comfort to your precious clients.