

If you’ve got an old sweater hanging out in your closet not keeping you warm, maybe it’s high time you sew a sweater scarf.
I got the idea for this project when a sweet friend sent me a beautiful handmade merino shawl. For all that I sew, I’m all thumbs with yarn. Still, I wanted to make something that came close to the cozy practicality of my friend’s shawl but made from an old sweater.
Add a lining of sherpa fleece, and this sweater scarf I’m going to show you how to make is warm and snuggly enough to stand up to the coldest of winter days. This is one layer you’re going to want close by you when the snow starts falling!
So grab an old sweater, and let’s get into sewing a sweater scarf.
elizabethmadethis.com is a participant in the Amazon Services LLC Associates Program, an affiliate advertising program designed to provide a way for websites to earn advertising revenues by advertising and linking toSome of the links below are affiliate links. This means that, at zero cost to you, I will earn an affiliate commission if you click through the link and finalize a purchase.

Table of Contents
Sweater scarf supplies
- 1 old sweater
- 1 yard sherpa fleece
- 80/12 universal needle
- rotary cutter or sewing scissors (excellent ones or a good beginner pair)
- polyester all-purpose thread to match
- chalk wheel
- clear quilting ruler (extra large one like this is great)
- sewing pins
- Clover Wonder Clips
- pattern weights
What kind of sweater works well for making a sweater scarf?
Because you’re going to line your sweater scarf with sherpa fleece, you want to look for lighter weight sweater knits. Sherpa is quite heavy, so any kind of chunky sweater is going to be too much thickness for this project.
Instead, look for lighter weight sweaters. The one I’m using here is an angora/acrylic/polyester blend. I regularly hit my local thrift store for sweaters come cooler weather. If you look regularly, you can very often find really nice quality merino or even cashmere sweaters light weight enough to work perfectly for this project.
Sew a sweater scarf
Cutting your sweater scarf pieces
First, lay your sweater on a flat surface. Draw a line with chalk from armpit to armpit.
Next, cut across the chalk line through both layers of your sweater. Set aside the rest of the sweater for another project.
From there, cut open one of the side seams.
Now you should have a long rectangle of fabric.


Cut the rectangle into triangles
Next, draw a line with chalk from one lower corner to one of the top corners along a diagonal.
Cut along this line. Note that this is a really long line. I actually abandoned my ruler in favor of a long wooden dowel to use as a straight edge to make the chalk line.

Next, lay the triangles on top of the sherpa fleece, setting pattern weights on top to hold down the sweater knit.
Cut 2 triangles the same size as the sweater pieces.
Sew the short seams
First, pin the short side of the sweater knit triangles right sides together.
Set your sewing machine to a narrow zigzag stitch (0.5mm width, 3.0length). Sew down the short side with 1/2” seam allowance.
Use Wonder Clips to hold the short side of the sherpa fleece triangles right sides together. You could also use pins here, but the clips are excellent for holding the thick layers together.


Lengthen your zigzag stitch to 3.5mm. Sherpa is quite thick and needs a longer stitch length to go through all the lofty loops it has. Sew down the short side with 1/2” seam allowance.
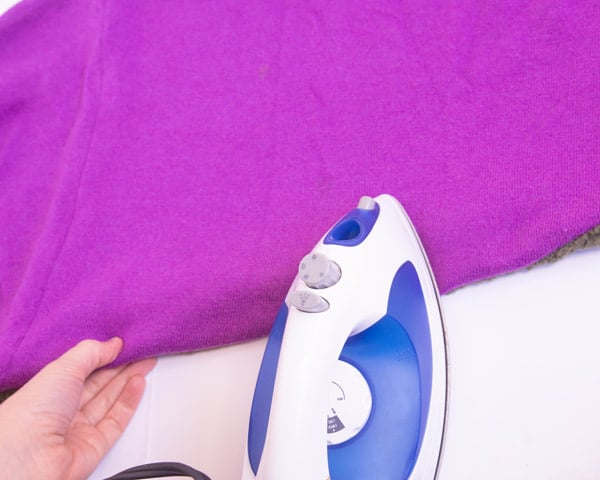
Press both of the seams open with an iron set on low heat. Now you have 2 long thin parallelograms.
Sew the sherpa fleece and the sweater knit together
Put the triangles right sides together, pinning all along the edges.
Sewing with the sweater side facing up, sew with 1/2” seam allowance with that same narrow zigzag stitch you’ve been using all the way around the edges.


Leave about 4” unsewn so that you can turn the scarf.
Trim off the pointy ends square to and not through the stitching line.
Turn the sweater scarf
From here, reach inside the hole with your hand and turn the scarf right side out through the hole.
Pressing
With a low heat, press the edges of the scarf. As you do this, roll the sherpa fleece towards the inside as best as you can. When you get to the spot where the hole is, press the seam allowances towards the inside so that they’re even with the pressed edges.
Topstitching and closing the hole

Sew 3/8” away from all the edges all the way around the scarf.
Finish up by giving you sweater scarf a good press all the way around the edges with an iron on low heat.
Wearing your sweater scarf


Play around with how you style your scarf. It’s kind of fun to loop it in different ways around you. I like to wrap it around, then tuck the ends under the big loop. You can also tie the ends together for a different look. Whatever way you choose to wear it, this diy sweater scarf will keep you nice and toasty.
For more winter sewing projects check out:
- DIY fingerless gloves
- DIY ruffle sweater
- The virtues of DIY fleece leggings
- How to make a hat from a sweater
- How to make a velvet twist headband

fingerless gloves from a sweater 

chenille knit, sweater knit, stretch velvet, fleece


Elizabeth Farr is the writer behind the Elizabeth Made This blog where she shares helpful sewing tips, step by step sewing tutorials and videos to help you explore your creativity through sewing. She has written sewing Eguides and patterns, been a featured teacher at Rebecca Page’s Sewing Summit and Jennifer Maker’s Holiday Maker Fest and her work has appeared in Seamwork and Altered Couture magazines. She also created a line of refashioned garments for SEWN Denver. When her sewing machine isn’t humming, she’s playing and teaching violin, and hanging around a good strategic board game with her husband and 4 kids.
I love all of your projects! Very good at explaining the steps.
Thank you! And thanks for reading!