

I really believe that the place where you sew should be a spot you want to be, and some happy sewing room decor can go a long way in creating that.
There’s all kinds of sewing room wall art you can find. I’ve seen some great, inspiring sorts of illustrations, paintings, and wall hangings from Home Goods to antique stores and Etsy.
But you don’t have to spend a lot of money to make your sewing space feel homey. All you need is a little DIY magic and some supplies you may already have.
Here’s a quick and easy wall to turn vintage patterns into wall art for your sewing room. It’s a great way to display your favorite patterns and they will make a fantastic quick and easy handmade gift for your sewing friends!

Table of Contents
Supplies for your vintage pattern sewing room decor

Audition your fabric choices
I love backing sewing room wall art with leftover fabric. You can almost always find something in your stash that’s big enough to back a cool piece of fabric or a fashion illustration!
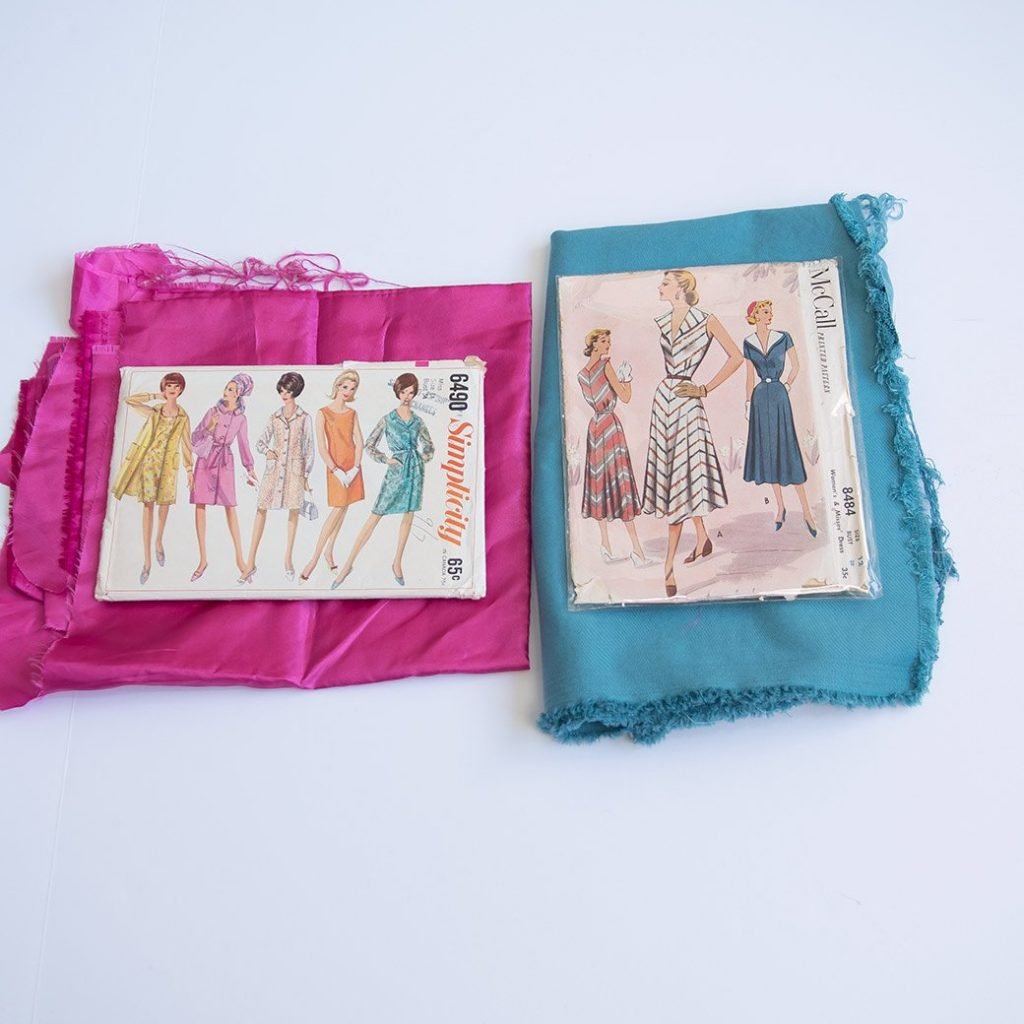

Whatever patterns you’ve chosen, pull a couple pieces and set each pattern on top. Which one catches your eye? Is there one that jumps out at you that you’ll want to keep looking at over and over again once it’s on the wall?
For me, I really like the 40s pattern on this warm blue. It really makes the subtle shell pink of the envelope pop a little more and it coordinates well with the other colors on the dresses.
I really wanted to go with the magenta satin, but it was a little too shiny! In the end, the more muted greens of this silk taffeta seemed a better choice for this 60s pattern.
See what you like for your own patterns.
Cut your fabric
Next, cut a rough rectangle from your fabric. Definitely iron it so that it looks all nice one it’s behind the glass.
From there, pop out the back from your picture frame.

Use your glue stick to adhere the fabric to the picture frame back.
Let the glue dry, then cut the excess fabric off around the edges.
Paint your picture frame
I’m not into neutral picture frames. They’re so boring and they can be visually heavy which is a drag on your picture!
If you have a general color scheme that you use in your sewing room, painting your frames can be a simple way to tie all those colors together.
Prep the frame, then paint with acrylic

Wipe your picture frame clean before you start painting. Odorless mineral spirits are an excellent choice for this, but Windex is good too. Clean the glass while you’re at it!
Take the glass out carefully, then paint the frame. It usually takes 2-3 coats with acrylic paint. Let each coat dry about 30 minutes before you add another coat.
You can sand with extra fine grit sandpaper in between coats for an ultra smooth finish.
Topcoat with acrylic varnish
To finish off your picture frame, paint on 1-2 coats of acrylic varnish. This will give it a little shine and a durable finish.
Prep your vintage pattern
File the pattern contents

Take the pattern envelope contents out of the envelope. Picture frames aren’t usually thick enough to handle all the envelope guts unless you’re using a shadow box.
That’s okay–that’s what manila envelopes are for! If you know this is a pattern that you will absolutely use, save the pattern and instructions in another envelope. File it however it is that you file your patterns.
Mount the pattern onto the fabric back
Next, flip the envelope over.
This is going to seem fussy, but I hate the idea of tape possibly damaging your beautiful pattern.

The solution is painter’s tape! If you ever need the envelope, you can remove the painter’s tape without the tape ripping the envelope.
Put a strip of painter’s tape towards the top middle of your pattern.
Add a piece of poster tape on top of the painter’s tape. The poster tape is double sided and strong enough to hold up cardboard on a wall. Peel off the backing from the poster tape once it’s on the painter’s tape.
From there, flip the envelope over and mount the pattern onto the fabric back you made earlier.
Finish up your vintage pattern sewing room decor
To finish up, pop the glass back into your finished frame, followed by the pattern/backing combo.


Find a spot in your sewing space and make a little grouping with your frames. Enjoy your new happy art on the cheap!

If you’re looking for sewing room ideas and you’re on a budget, this is a great inexpensive DIY for you. I hope you’ll try it out!
Here’s the video version of this tutorial:
Other sewing room gift ideas

2019 gift guide for sewists under $15
love the embroidery kit, it’d make awesome DIY wall art!

The under $30 gift list
That sewing machine wall clock tho!

Under $70 gift guide
Cool sewing books + some really nice framable fashion illustrations
I’m also adding to my YouTube playlist for Handmade Holidays for more easy gift ideas you can make for everyone on your list.

Elizabeth Farr is the writer behind the Elizabeth Made This blog where she shares helpful sewing tips, step by step sewing tutorials and videos to help you explore your creativity through sewing. She has written sewing Eguides and patterns, been a featured teacher at Rebecca Page’s Sewing Summit and Jennifer Maker’s Holiday Maker Fest and her work has appeared in Seamwork and Altered Couture magazines. She also created a line of refashioned garments for SEWN Denver. When her sewing machine isn’t humming, she’s playing and teaching violin, and hanging around a good strategic board game with her husband and 4 kids.