
Do you have dreams of making a pleated skirt? If you, you need to know how to sew pleats.
I went to private school for a time growing up, so I became well-acquainted with pleated skirts. The swish that the pleats provided was unparalleled in my 5 year old mind, though I wished that the fabric my skirt was made from was a little less scratchy. Thankfully adult me can make better choices!
Pleats are a classic element that adds fullness in areas of a garment. They can be added to give some wiggle room to move (kick pleats), structure or style alone.
The tricky thing with sewing pleats is marking everything accurately and knowing on which side of the fabric to make the pleats.
This post is all about helping you understand what types of pleats are out there. We’ll talk about what kinds of fabrics work best with pleats. After that, I’ll show you the easy way to mark pleats, how to prepare them, and how to sew pleats step by step.
Ready to add sewing pleats to your sewing skills? Let’s do this.
elizabethmadethis.com is a participant in the Amazon Services LLC Associates Program, an affiliate advertising program designed to provide a way for websites to earn advertising revenues by advertising and linking toSome of the links below are affiliate links. This means that, at zero cost to you, I will earn an affiliate commission if you click through the link and finalize a purchase.

Table of Contents
What is a pleat?
A pleat is a fold of fabric that create fullness in certain areas of a garment. They can be concentrated in one area (over the bust, at the center back hem in a skirt) or be an element used throughout as in a traditional kilt.

These simple folds of fabric can be a strong decorative element on a garment, giving some good swing or crisp architecture that stands out.
Pleat terminology and symbols you need to know before sewing

- Foldline: The line on which a pleat is folded.
- Placement line: The spot where folds of a pleat are aligned.
- Basting: Temporary stitching by hand or machine that keeps the pleats in place during construction.
- Arrows: look for arrows on a pattern to indicate which direction a fold should face. If you fold opposite the direction of the arrows, you will get a different type of pleat.
Types of pleats


- Knife pleat: each pleat has one foldline and one placement line. Knife pleats are usually seen in multiples (common in skirts), all facing the same direction.
- Box pleat: each box pleat has two fold lines, and the pleat is folded towards one central placement line on the wrong side of the pleat. A box-like shape is formed on the right side of the pleat. Box pleats are a common pleat in shirts, skirts, and dresses, usually centered in one area.
- Inverted box pleat: Inverted pleats are the same as a box pleats, but the “box” is formed on the wrong side of the fabric.
- Accordion pleats: Did you ever make paper fans as a kid, folding the paper one way, then the other? Then you’ve made accordion pleats! Named for their resemblance to accordion bellows, these pleats stand away from the body, giving a lot of flare and a crisp look.
- Pleats with an underlay: Pleats with an underlayment is a fun way to add some contrast in your pleats. Pleats are folded like box pleats, but instead of using self-fabric for the backside of the pleat, contrast fabric is sewn to the edges of the backside of the pleat. The contrast fabric then peeks out between the layers.
- Double pleats: double pleats are formed with more complicated folding making for pleats that look the same on both sides. These are commonly seen in kilts. If you want to dive deeper into understanding double pleats and other types of lesser known pleats, this is an excellent article from a traditional kilt maker worth reading.
- Cartridge pleats: made when you need to fit a lot of fabric into a tiny space. Common in historical sewing and worked by hand.
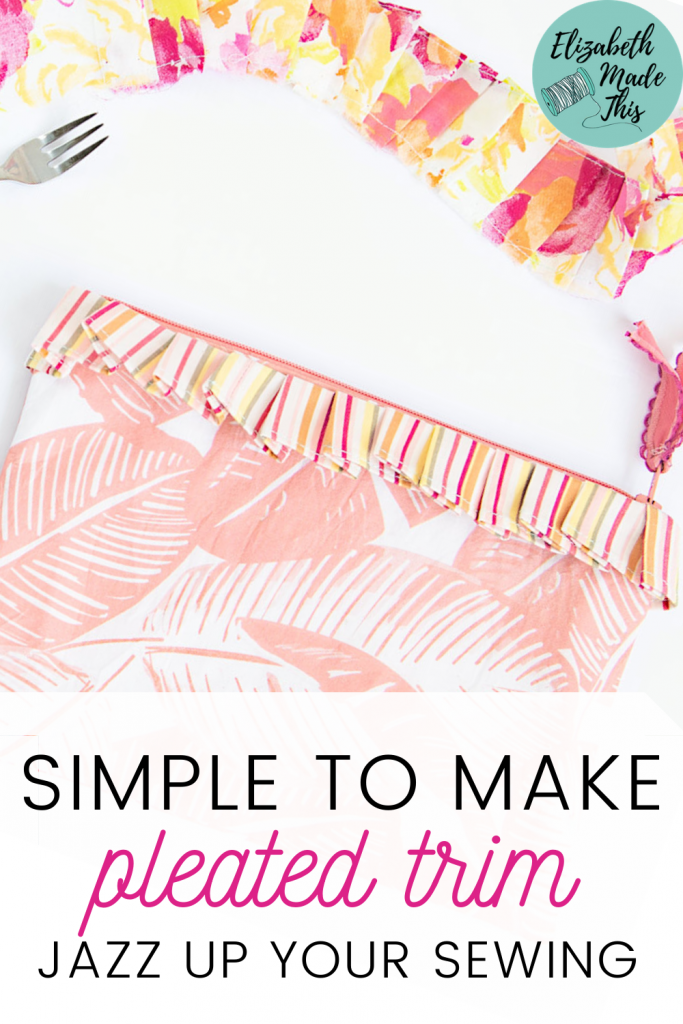
- Fork pleats: a fun way to make pleated trim!
Pleat finishes
After you go through the work of making the pleats and carefully sewing them, there’s a few different ways to finish the pleats. Think of these as something similar to finishing seams on the inside of a garment. Here they are:
- Soft fold pleats: Nothing special is done to the pleats after sewing. Soft fold pleats are best made in softer fabrics. They provide the space and flow of pleats with less of the firm structure.
- Sharp fold pleats: These pleats are pressed thoroughly throughout the sewing process. These are best made from fabrics that crease well when pressed.
- Topstitched pleats: Topstitched pleats are stitched in certain areas of the pleated area to keep them in place. Sew on either side of the placement line as indicated. You’ll often see this on skirts in the waist to hip area.
- Edgestitched pleats: Stitch through the pleat fold itself (2 layers of fabric) along the length of the pleat as close as possible to the foldline.
- Invisibly stitched pleats: Pleats are stitched on the placement line or fold line usually from the wrong side. This will keep the pleats in place without any visible stitching.


What are the best fabrics for pleats?
You can pleat nearly any type of fabric, but in general, you want to choose fabric for pleats that:
- Can hold a crease: Some synthetic fibers will press well making a crease, and others will not. The same is true of knits. You don’t want to go through the work of careful pleating to not have it show up in your final product. I personally always prefer natural fiber fabrics when working with pleats (wool, cotton, linen, silk). If you’re not sure about a fabric, make some test pleats on a square. Then you’ll be able to judge for yourself if you like the results in a particular fabric.
- Can hold some structure: Pleats in drapey fabrics will be tough to handle as they’ll slip all over the place. It’s possible to make pleats in fluid fabrics, but they won’t stand out the same, and they’ll be a bear to sew.
How to sew pleats
Supplies for sewing pleats
- Quilting ruler (this one is awesome for everything)
- Tailor’s chalk or fabric marking pen
- small hand needle
- contrast color thread
- iron
- strips of brown paper bag or craft paper (optional depending on the fabric used)
- press cloth (silk organza is perfect here)
- Glass head pins (these won’t melt during pressing).
- Universal sewing needles for sewing machine
Make a test pleat and avoid heartache
The easiest way to avoid ruining a piece of fabric in general is to make a test.
“How can you ruin pleats,” I hear you ask?
Some fabrics like linen can get shiny when they are pressed well as you do for pleats. Before you go ruining a set of pleats with tell-tale “I pressed it too hard” shine, cut a square of leftover fabric you’re making your project from and fold a couple pleats.
A rough fold works fine here. This is a test!
After you have your test pleat ready, cut strips of brown paper from a grocery bag or brown kraft paper. Lay the paper under the pleat edge before you press. Then press your pleat. Voila! No more shiny pleats.

I’m putting this section right at the front because I don’t want you to go through all the work of folding your pleats and then ruin them with pressing.
A test like this will give you a good understanding of how your fabric will behave with pleats, so don’t skip this step.
Align your fabric
Be sure to follow grainlines when you’re cutting your fabric. If your pleats are off-grain at all, you might see diagonal lines form across the finished pleats.
How to mark fabric for pleats
Use your paper pattern accurately when you sew pleats!
I usually opt for cutting all my patterns with the aid of pattern weights, but when I’m working on a pattern with pleats, I will often pin the pattern to the fabric so that it does not shift at all.
For narrow pleats that aren’t too deep vertically, carefully transfer markings either by making a tiny clip through the marking inside the seam allowance or with a fabric marker. If you’re adept at making tailor’s tacks, you can do that instead.

For full length pleats, mark the full placement line with chalk or marker and a ruler, then trace the line with thread.
Be sure that you know which is the right side and the wrong side of your fabric. Some fabrics look almost identical on the right and wrong side, so be careful here. Pleating will look different if you work on the opposite side indicated.
Fold the pleats

Next, fold the fabric along the foldline, bringing it to its matching placement line. Be sure to line up the lines exactly for the best accuracy.
Pinning pleats

Pin through each pleat perpendicular to the pleat along its length and at the top.
Fitting the pleats
Before you go on, try on your your project, especially if you’re making a project with lots of pleats. In truth, the width of each pleat can really change the fit.
If you made a deeper pleat or narrower pleat than indicated, it’ll change the fit. Make sure things fit as you like them too. If you need a little extra room, unpin your pleats and pin slightly narrower pleats. Fold out a little more fabric in your pleat if you need a deep pleat instead.
Baste the pleats (optional but awesome)
Thread up a hand needle with smooth, fine thread (silk is great) and baste down each pleat the length of the fabric by taking large stitches through all layers close to the foldline. Remove the pins as you go. Do not remove the pins at the top of each pleat.

Try to handle the pleats as lightly as possible at this point. The basting does an excellent job holding down the pleats without shifting, but you can still pull the fabric apart if you’re not paying attention.
You may skip basting pleats if you’re working with small pleats in one part of a garment like a single pleat in center back on a shirt, for instance. Pins are adequate in these cases, and you can even press right over glass head pins.
Press the pleats
Heat up your iron to a setting appropriate for the fabric that you’re using.
From here, place your pleats on your ironing board face up. Lay the press cloth over the top of the pleats in the area marked for the pleat.

Do not move the iron back and forth over the pleats as you could twist the direction of the pleat. Instead, press down the iron for a few seconds, then lift and press in the next area. Always use a press cloth between the iron and the pleat to protect the fabric from too much heat. Silk organza makes the best press cloth here since you can see through it.
For soft pleats, use light steam. For crisp pleats, use heavy steam and a damp press cloth.
Don’t forget to lay down strips of brown paper under the edge of a pleat if your fabric gets shiny.
Repeat the process of pressing on the backside of the pleat as well.
How to sew pleats: Finishing pleats
Up until this point, your sewing machine hasn’t touched your pleats. From here, you’ll need it, set to just a simple straight stitch.
- Invisibly stitched pleats: flip the pleat to the wrong side bringing placement lines together. Sew along the marked line of the placement line through both layers as indicated on the pattern. This is a common way to hold box pleats/inverted pleats in place. Tie a knot at the bottom of the stitching, then refold and pin the pleat. No stitching should be visible on the right side
- Topstitched pleats: you might see this finish in the hip-waist area with pleats. Stitch through all layers from one side of the placement line. If you’re working with a box pleat, pivot at the bottom of the area indicated for topstitching, stitching across the placement line. Continue stitching on the opposite side of the placement line. This finish will look like the topstitching on a centered zipper.
- Edgestitched pleats: Edgestitching a pleat is a great decorative finish that holds the shape of the pleat well. To do this, stitch close to the foldline down the length of the pleat as close to the folded edge as you can stitch. Repeat for the next pleat and however many pleats you have.

To finish sewing the pleats, stitch across the top of the pleated area inside the seam allowance. Then sew the pleated area into the pattern piece it fits into (i.e. bodice, waistband etc).
Hemming pleats
As you press up your hem for your pleated project, make sure that the hem remains level. You may need to adjust the hem pressing in the area of each pleat to make a level hem. A dress form is helpful here.
To stitch your hem, you can stitch by hand or use a blind hem stitch for the cleanest look.
Alternatively, if you’re using pleats as a simple trim, you can sew a baby hem as I do here on this fun pleated trim.

Caring for pleats
Pleated garments can be special. The more complicated your pleats, it’s best to avoid the rough treatment of the washing machine. Consider dry cleaning or washing by hand.
And that’s how to sew pleats. With a little practice and some careful work, you too can sew pleats that will become a feature in your project you can be proud to say you made yourself.

Elizabeth Farr is the writer behind the Elizabeth Made This blog where she shares helpful sewing tips, step by step sewing tutorials and videos to help you explore your creativity through sewing. She has written sewing Eguides and patterns, been a featured teacher at Rebecca Page’s Sewing Summit and Jennifer Maker’s Holiday Maker Fest and her work has appeared in Seamwork and Altered Couture magazines. She also created a line of refashioned garments for SEWN Denver. When her sewing machine isn’t humming, she’s playing and teaching violin, and hanging around a good strategic board game with her husband and 4 kids.