

Let’s talk how to set snaps. Ooh, I love me some snaps. Snaps are a great alternative whenever you don’t want to use buttons.
The truth is that some fabrics don’t make sewing buttonholes easy (knits!). And sometimes snaps make it easier for functional things like diaper changes. That’s why you’ll see snaps on baby onesies, bodysuits, and kids’ clothes in general. I’ve wrangled my fair share of kids into clothes with buttons, and I know that snaps are way better in this regard.

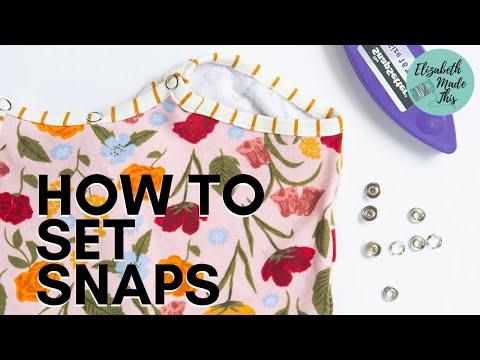
Pearl snaps on Liberty of London jersey


They’ve also got decorative potential. You’ve seen pearl snaps on Western style shirts, and they add a little bit of glisten on plain fabric. Think how fabulous a long shirtdress could be a row of pearl snaps!
That you get to skip the buttonholes and just whack things with a hammer is all the better.
We’ll talk tools, and how to set snaps. I’ll be talking about installing ring snaps and pearl snaps. Then I’ll finish up with some common problems you might run into when you’re setting snaps.
It’s not often in a sewing context I get to say grab a hammer, but do that, and let’s get snapping.

elizabethmadethis.com is a participant in the Amazon Services LLC Associates Program, an affiliate advertising program designed to provide a way for websites to earn advertising revenues by advertising and linking toSome of the links below are affiliate links. This means that, at zero cost to you, I will earn an affiliate commission if you click through the link and finalize a purchase.
Table of Contents
Understanding snap parts
Before we get into setting, there’s a couple things to know about snaps themselves.

Each snap set is made up of 4 parts:
- Ring (or pearl)–this is the decorative outer part of the snap you’ll see on the front side of your project
- Stud: this is the ball end that’ll lock into the socket
- Socket: This is the female part of the snap that locks into place with the stud. It’s important to note that it has two sides: the larger side of the socket fits into place with the open ring. The smaller hole is what will snap into place with the socket.
- Open ring: this is the plain backing ring that will sit on the wrong side of the fabric. Open rings can be used in place of decorative colored rings or pearls as well.
Each piece has a partner that will get hammered together into place. The ring (or pearl) goes with the stud, and the socket goes with the open ring. If it’s easier to think about it, both the stud and the socket need a ring.
My favorite setting tool for snaps

There’s lots of different tools out there for installing set-in snaps. There’s snap setting pliers, hammer + anvil hand setters, and even professional presses. I’ve tried them all with the exception of the professional press which I personally think is too expensive and overkill unless you’re setting snaps all the time.
My favorite tool for setting snaps though has to be the Snap Source setter. It’s a simple little sturdy plastic setter that you use in conjunction with a hammer. What I love about it is that it makes it very difficult to misalign your snaps.
With pliers and the hand hammer + anvil, it’s not uncommon for the snaps to get shifted ever so slightly when you set them. That means that the pokey bits will be visible and make for a snap that’ll rip out over time.
I’ve really never that issue with the Snap Source tool.
Snap Source also has a really nice selection of colors for both their rings and their pearl snaps. This shop on Etsy also had some fun decorative pearl snaps like marbelized and rhinestones. Whatever snaps you decide on, just make sure to match the size of the tool to the size of the snap.
Snap setting instructions for ring snaps
Ring snaps are wonderful for bodysuits and kids’ clothes. My favorite bibs someone made for me when my oldest son with born fastened with a ring snap!
They make for easy diaper changing access on onesies, and you can even use them in place of buttons on your own clothes. When I could find the right buttons for this dress, I custom painted a round of ring snaps for a perfect, subtle match.
Here’s how to set snaps of the ring variety.

Prepping your fabric for snaps
The most important thing to remember with any type of snaps is that the snaps need support. They’re very much like buttons here. Snaps need to be installed in areas with at least 2 layers of fabric and a layer of fusible interfacing.

The interfacing will help stabilize the area and strengthen it so you won’t end up with snaps that just rip out.
First things first, add a strip of fusible to both sides of the area where you’ll be installing snaps.
After that, mark your snaps just as you would for buttons. A Simflex gauge + a washable fabric maker will help!

How to install the ring + stud
Line up the ring around the mark on the outside of your fabric. Press it through the fabric, then flip it over so that it sits in the circle base of the snap setting tool. Hold it in place with your finger, then put the second layer with the hole it it over the rectangular post in the tool.

Push the ring through right side use pen to hold snap in place


This is the tricky bit. You’re going to need to remove your finger, but if you just yank it out, the snap will shift on you and won’t sit in that little circular base.
Instead, before you pull out your finger, place the end of a pen into the hole to hold down the fabric and ring. Next, remove your finger and jiggle it around to make sure the ring is sitting right in that base.
Pop the stud into the hole, so that the ball end is visible.
After that, add the top part of the tool so that the hole and the circular post are on top of each other.


Finish it off by whacking your hammer several times to set the snap. Let’s do side 2.
How to set the socket + ring
We’ll put the second side of the snap together just like the first with a couple changes.
Stick a pin through your marking on the second side. Flip it over to the wrong side of your project and center the open ring over the pin.


From here, push the ring through the fabric. Flip it over and center it on the tool’s base.
Next, add the second layer of the tool, using the pen to keep the snap in place as you take out your finger.
Add the socket into the tool’s hole, making sure that the smaller side of the socket is face up. If it’s backwards, the snap won’t set.
Add the top layer of your tool, and whack away. Check your work and snap both sides together.
Yay! It’s a proper ring snap!
How to set pearl snaps
You set pearl snaps the exact same way as you do ring snaps. The decorative pearl takes the place of the top ring and gets hammered together with the socket. There is one difference here.
You’ll need to use the pearl base adapter. If you set pearl snaps with the regular base, they can crack. The pearl base adapter has a curved cup in the bottom where the pearl can sit securely without worry of it getting cracked.
You can use a #16 pearl adapter with the #16 tool. You can also use #18 pearl snaps with the #16 tool, provided that you use the larger #18 base adapter. It’s a little confusing, just know that the #18 snaps are a little larger and that both kinds of snaps use the #16 tool.


To set pearl snaps, go through the same process as you did for the ring snaps, simply replace the top ring with the pearl.
I made a video so you could see both types a little easier!
How to fix snap setting problems
Problem #1: The snaps are misaligned
How do you know this happened? You’ll see the prongs poking through the fabric. The snap won’t snap together well and the snap will fall off over time.
If you see this, grab a pair of needlenose pliers and carefully pull off the offending part. Try your best not to damage the fabric. Set a new snap in its place.
Problem #2: One of the pieces pops straight off
This can happen if the fabric that you’re setting the fabric on is too thick. The prongs won’t be able to get a good grip on the other part of the snap and the pieces can literally pop off.
You can test this before setting a snap by poking a ring through your layers. If you can’t feel the pokey bits, pick a larger heavy duty snap or a different closure like buttons.
Problem #3: adding a snap really distorts the fabric
I’ve seen this happen especially when you add snaps to ribbing. Just make sure to interface the area where the snaps are and it’ll go better.
So that’s all about how to set snaps. Now you can put them into practice with this henley sewing tutorial. Skip the buttonholes and add snaps in their place!
How to sew a henley t-shirt
Take a basic raglan t-shirt and transform it into a henley with this simple hack tutorial


Elizabeth Farr is the writer behind the Elizabeth Made This blog where she shares helpful sewing tips, step by step sewing tutorials and videos to help you explore your creativity through sewing. She has written sewing Eguides and patterns, been a featured teacher at Rebecca Page’s Sewing Summit and Jennifer Maker’s Holiday Maker Fest and her work has appeared in Seamwork and Altered Couture magazines. She also created a line of refashioned garments for SEWN Denver. When her sewing machine isn’t humming, she’s playing and teaching violin, and hanging around a good strategic board game with her husband and 4 kids.
Hi elizabeth,
I just watched your video on how to set Pearl Snaps on a blouse and you said that the tool you demonstrated was for Size 16 snaps and I have no idea what size mine are, except that they are 12 mm which is 3/8 of an inch. I am using a tool that came with a set of plastic snaps that I tried but they squish down the studs so they don’t snap. I am not sure what to do!
It sounds like the snap did not set correctly. Working with a snap setter can require a little bit of practice. If the fabric is too thick, or the prongs get slightly misaligned, it can be tough to set the snaps. I often practice on scraps with the same amount of thickness that I’m using on a garment. That way, if the fabric is being grumpy with me, I won’t have wasted more time and materials. The good news is that you can always use buttonholes in a place where snaps are indicated.