
Can you actually embroider on a regular sewing machine? I think it’s a giant myth in the sewing world that you need a big fancy embroidery machine to tackle basic embroidery. 
Embroidery is such a nice thing to add to any sewing project to add a little bit extra personality beyond whatever it is that you’ve made. Let’s talk how you can embroider on a regular sewing machine.

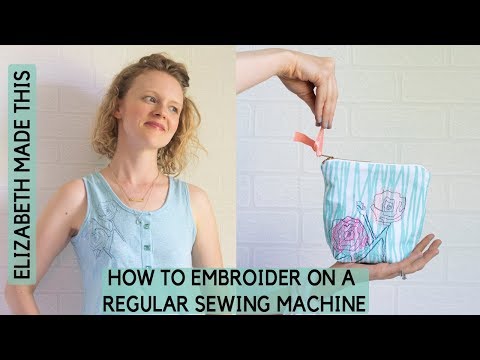
After a rather involved violin I added to a t-shirt, I wanted to make something simpler. So I created this Angle Roses Embroidery Template, and I’d like to offer it to you today as a free download when you sign up for my newsletter.
The goal of the Angle Roses Embroidery Template is to teach you some basics of how to embroider on a regular sewing machine.
Table of Contents
Can I actually embroidery on a regular sewing machine?
You bet you can! You don’t even need a fancy foot to do so. Embroidery on a regular sewing machine can be as simple as tracing a design onto a stabilizer and tracing along with the needle as if it were a pencil. Plus, you can always make it more complicated if you want to. Here are some supplies that will help you, and then I’ll give some examples of how to spice up this basic design.
elizabethmadethis.com is a participant in the Amazon Services LLC Associates Program, an affiliate advertising program designed to provide a way for websites to earn advertising revenues by advertising and linking toSome of the links below are affiliate links. This means that, at zero cost to you, I will earn an affiliate commission if you click through the link and finalize a purchase.
Supplies needed for embroidery on a regular sewing machine
- Your design
- Water soluble stabilizer–I really like Solvy by Sulky. It’s great for transferring a design and making some nice stitches. That you can wash it out in the end makes for stitches that won’t be damaged by pulling away the excess stabilizer as can happen in a lot of tear-away stabilizers.
- Cutaway or tear away stabilizer–this is a different kind of stabilizer that’ll go on the backside of the design.
- Fine line permanent marker–for tracing your design!
- Uncut fabric or a project that’s already in progress: anything is game here, and you can even use this technique to embellish ready to wear items.
- Thread of your choice: contrast is key, so you’ll want to practice on some scraps if possible to help you make a good decision.
- Glue stick: For gently securing the stabilizer to your work area.
- Machine foot of your choice: I go into the advantages of each foot in the video for this project, but basically, my top 3 choices are straight stitch foot, clear applique foot, and a free motion embroidery foot.
How can you use this design?
After you’ve downloaded the design, the PDF file will give you a tutorial and several ideas for how you can use them. I also give some basic directions to help you achieve what I’ve made. There’s actually a 5th level of difficulty here that I didn’t cover with this project but that I did get to in my violin t-shirt that I’ll talk about another day. It’s basically a hybrid of applique and embroidery, and it’s one of my very favorite techniques!
Simple and clean
The easiest way to incorporate the Angle Roses Embroidery Template is to simply stitch it out in one color. A good strongly contrasting thread will be a great choice. Here I’ve added to a Blank Slate Patterns Texana tank.

If you want to spend some more time, add multiple motifs on a skirt
Punch it up with color
Before you stitch out the design, add a little color to your fabric. Here I roughly stitched back and forth with my free motion foot to lay down some color. It’s amazing how much the character changes with this little addition!
Color between the lines
After stitching out the design, why not go back and stitch with some contrast thread to bring it into full color? The roses came into full bloom in this funky quilted necklace.

I’d love it if you would join the newsletter if for no other reason than I’m itching to see what you would do with this template! There’s so many possibilities! To make it easy to sign up, click on any of the pictures in this post or below, and it’ll take you to the sign up.
Learn how to embroider on a regular machine video
Learn more about sewing

If you’re wanting to learn to sew and looking for an online class that combines a lot of the ways of learning we’ve been talking about here, Self-Reliant Sewing might be for you.
I created this class with sequential, clear goals for every project. You won’t be left to wonder what you’re supposed to be learning. We’ll build a base of information that’ll help you make thoughtful choices as you grow in your sewing journey.

Elizabeth Farr is the writer behind the Elizabeth Made This blog where she shares helpful sewing tips, step by step sewing tutorials and videos to help you explore your creativity through sewing. She has written sewing Eguides and patterns, been a featured teacher at Rebecca Page’s Sewing Summit and Jennifer Maker’s Holiday Maker Fest and her work has appeared in Seamwork and Altered Couture magazines. She also created a line of refashioned garments for SEWN Denver. When her sewing machine isn’t humming, she’s playing and teaching violin, and hanging around a good strategic board game with her husband and 4 kids.
Hi Elizabeth – – I love this post and everything you do as you know, so I nominated you for the mystery blogger award, details here….https://ellegeemakes.com/2018/07/15/the-mystery-blogger-award/ I hope you’ll join the fun!!
Thanks Linda! You are so kind, and it looks like the comment bug got resolved (yay!!)!
Who inspires me? Your name could not have been missing on that list! I have nominated you for the Mystery Blogger Award – http://georgiasew.blogspot.com/2018/07/the-mystery-blogger-award.html
Aw, thanks Georgia!
hi elizabeth,
Really great tips for a beginner. Thank you.
but a regular sewing machine takes longer to make an embroidery design. and its so harassing to do the job with a sewing machine. So in this case everybody should use an embroidery machine for the job
Thanks again
No doubt an embroidery machine will do the work faster and better, but not everyone wants or can afford a dedicated embroidery machine. So if you don’t have one and embroidery is something you do occasionally and not on a big scale, there are options to use your regular machine.
Hi Elizabeth,
this is one of the most wonderful posts. and it can save some money for me buying a new embroidery machine. the sewing machine can do some amazing job for me. thank you for your tips
You are awesome! I get so many ideas here! Creative and innovative. You are one creative chick!
Thank you!
Thank you so much Elizabeth.
I was struggling trying to embroider with my basic Janome.
It has prevented me from completing my 1st quilt. I just CAN’T finish my quilt without embroidering a detailed note. I won’t settle for writing with a permanent marker. I worry about the possibility of the ink bleeding or blurring in the wash & of course fading.
There are 2 quilts I’ve worked on at the same time. The other quilt is “Simply Sampled” , I’d like to embroider the name of each block on the fabric.
Just last night in class the ladies & I were talking about the DREAM MACHINES we’d all love to have. Fancy combination sewing/embroidery machines that cost $20,000+
Cassie
I would consider embroidering something like a note by hand, but it’s always good to dream too! Some of those machines are awe-inspiring!
It took quite a while to find your video on YouTube.
YOUR VIDEO was the only true “embroider with a plain sewing machine” that I could find.
Other videos all show fancy free motion machines, with plenty of stitch options.
They put the fabric on an embroidery hoop, then move the hoop around.
I present to you this digital metal to award you of “Most Helpful YouTuber” for topic searched & no click bait title!
Glad it was what you were looking for. That was my goal!