
Today I’ll show you how to darn a sock.
With Fall in the air, it’s time to pull out all my favorite socks. I’ll be the first to admit I’m rough on my socks with all the walking I do. Thankfully, it’s really easy to fix your socks, and unlike other mending projects, darning a sock is really quick.
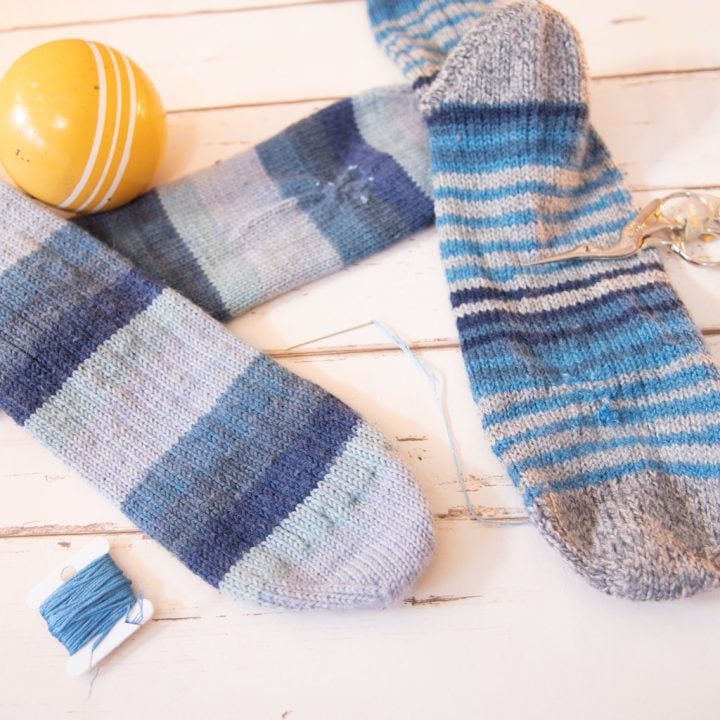
Shoot, if you can extend the life of socks, that’s a win for everybody. I know my friend who made the beautiful hand knitted socks you’ll see in the pictures was ready to toss these, before I said, “Whoa, I can fix that!”
So pull out your favorite but maybe a little neglected socks and let’s fix them now.

Table of Contents
How to darn a sock supplies
elizabethmadethis.com is a participant in the Amazon Services LLC Associates Program, an affiliate advertising program designed to provide a way for websites to earn advertising revenues by advertising and linking toSome of the links below are affiliate links. This means that, at zero cost to you, I will earn an affiliate commission if you click through the link and finalize a purchase.
- small ball (baseball, tennis ball, etc) or darning egg
- hand needle
- embroidery floss
- sock with a hole in it
When should I darn a sock?
Obviously, a stitch in time saves nine here. If you can darn up your sock before it sprouts massive holes, this type of fix will be more effective.
If you have a sock with larger holes, you might consider more of a woven mending patch.
Do I need a darning egg to darn a sock?
Darning eggs are one of those old kind of sewing notions. They’re pretty cool because they have a handle attached to them, making it a little easier to work with your sock as you’re repairing it.

That being said, any hand sized ball you have hanging around will also work for darning a sock.
The idea is that the round shape of the darning egg or ball helps hold the hole open while you’re stitching. This’ll make it easier to find the spots where the sock yarns are a little thinner, especially if you need to fix a sock in a few spots.
What type of thread should I use to darn a sock?
My real answer to this question is: use what you have.
The better answer is, try to get as close as you can to the weight of the yarn in the sock itself. If you do make your own socks, use scrap yarn.
If you’re like me and don’t make socks, you probably don’t have scrap yarn on hand.
*Lightbulb*: It occurred to me that the simplest way to emulate the weight of a given yarn is with embroidery floss. It’s easy to find the right color to match your sock, and the floss itself is soft, making for a comfortable repair.
All you need to do is separate out as many threads as you need to get close to the weight of yarn used in your sock.
How to darn a sock step by step
First, place your ball inside the sock with the hole side up.
Thread up your needle
Cut a length of embroidery floss. Next, separate out as many threads as you need to get close to the weight of the yarn used in the sock.


For this sock, 3 strands of floss is about right.
Thread the needle and make a knot at the end.
Stitching up the hole
Insert the threaded needle at the bottom of the hole, keeping the knot on the inside of the sock.
Grab a couple threads of the sock with the needle, then pass the needle across the hole to the opposite side. As you pass the needle to the other side, pick up a couple threads from the sock.

Do not pull the stitch tight.
Stitch from side to side

From here, keep passing the needle across the hole from side to side, picking up threads from the sock until you get to the top of the hole. Keep the stitches as close together vertically as you can.
Closing up the hole
This part is magic fun.
At the top of the hole, pull firmly on the thread. The thread will gather itself up and the hole will close.

Make a second knot close to the end of the thread. Bury the knot by making a small stitch towards the inside of the sock then pulling on the thread. On a fairly loosely knit sock like this the knot will get pulled inside the sock. If your thread isn’t cooperating and the knot stays on the outside, it’s okay too. You’ll only offend the bottom of your foot, so no big deal.
Repeat the process for other holes
If you have more smaller holes or places where the sock threads are a little more worn, repeat the process.
Finishing darning your socks
To finish darning a sock, pull the ball out and enjoy the new life you’ve added to your favorite socks.
Use this sock darning fix for knit fabrics
You can use this same technique for closing up small holes in knit fabrics. Socks are knit after all. Use a single strand of matching thread for most jerseys, but otherwise, the same method will work for your favorite t-shirt that sprung a hole.
More mending inspiration
Fellow blogger Paulette over at Petite Font started a hashtag regarding mending called #themendyproject. Her goal was to encourage herself and others to pick up a needle and start fixing more and wasting less of our clothes. Definitely check out The Mendy Project if you want some accountability in approaching that bag of holey clothes so you too can become a “Mendylorian.”
Also, my friend Nicki over at The Ruffled Purse has an excellent post on How to Fix Crotch Holes in Jeans. This is definitely a mending project that takes some time, but Nicki does a great job of walking you step by step through the whole process.
How to mend a sock in 1 minute flat
Learn how to darn a sock with this easy step by step sewing tutorial. This practical mending project takes just 1 minute.
You should give mending socks a go because: •This is sooo fast and easy •You'll get more wear out of your favorite socks and •Keeping feet toasty is worth a little effortMaterials
- small ball (baseball, tennis ball, etc) or darning egg
- hand needle
- embroidery floss
- sock with a hole in it
Instructions
- First thread up a needle with embroidery floss. Knot it at the end.
- Next, place your ball inside the sock with the hole side up.
- Insert the needle at the bottom of the hole, keeping the knot on the inside of the sock.
- Grab a couple threads of the sock with the needle, then pass the needle across the hole to the opposite side.
- As you pass the needle to the other side, pick up a couple threads from the sock.
- From here, keep passing the needle across the hole from side to side, picking up threads from the sock until you get to the top of the hole.
- Make a second knot close to the end of the thread and cut off the extra thread.
- Keep stitching up more holes if you have them, then pop them on your feet and feel good about your effort!
Notes
There is a special tool called a darning egg or a darning mushroom specifically made to help you do this kind of mending. Don't worry if you don't have one. You can fix your socks with any ball you have hanging around.
More sewing repairs:


Elizabeth Farr is the writer behind the Elizabeth Made This blog where she shares helpful sewing tips, step by step sewing tutorials and videos to help you explore your creativity through sewing. She has written sewing Eguides and patterns, been a featured teacher at Rebecca Page’s Sewing Summit and Jennifer Maker’s Holiday Maker Fest and her work has appeared in Seamwork and Altered Couture magazines. She also created a line of refashioned garments for SEWN Denver. When her sewing machine isn’t humming, she’s playing and teaching violin, and hanging around a good strategic board game with her husband and 4 kids.
Maybe, just maybe I get some socks fixed. Thank-you. I have many worn at the heel from when I was in a boot. Happy Sewing.
You can totally handle this!
It can feel so gratifying and self-sufficient to be able to fix something yourself and keep it from turning into trash too soon! Congratulations!
Absolutely.
My Nanny taught me how to darn. When she was alive I used to sit and watch her darn her stockings. She used a darning mushroom (as we call them). I have her mushroom and when using it, I feel very much connected to her. She taught me a slightly different method. As you showed weave the needle back and forth picking up stitches of the garment but don’t pull tight. Repeat in the other direction picking up a thread of the material, then weaving under/over the previous stitches so vertical on the garment then working horizontal. This creates a patch, a longer process than yours, but prevents that little seam from only working the ladder stitch one way and pulling tight. Sadly, so many of these valuable mend and make do skills have been lost over the generations
Thank you for your emails, I love receiving them.
Tiffany
x
I use the patch method too for bigger fixes–it’s excellent. That’s cool to have your Granny’s tool. Those kind of special memories can’t be replaced!
I’m 89 yrs. old and have been darning socks for a long time….
My method is a little different from yours also. I always threaded the needle, using darning cotton mostly, and, without a knot, did a couple back stitches to secure, and then sewed a circle around the outside of the hole. Then stitch straight up and down across the hole, catching a bit of the outside circle at each end (this gives an anchor for the stitches).
Then, like Tiffany, I would weave crosswise thru the up and down stitches to gradually fill in the hole. It leaves a nice flat, little checker-board mend.
That makes for a beautiful fix!