I’ve been talking about it for a long time now, and today is the day I get to show off my husband’s 10th Doctor Suit. For my first real ventures into cosplay, my Rose Tyler jacket and this suit have are really big undertakings. Little tiny nothing projects and organization tasks in my sewing room have been my favored way to detox this week after all of the hard concentration these two projects have required. But let’s get to talking about the 10th Doctor Suit already! This is a really long post, so I’ll ask my question now:
Table of Contents
What’s your favorite costume or your biggest costume project?
10th Doctor Suit pattern
The pattern for the 10th Doctor Suit is from Bad Wolf Costumes. Alex and his wife, Kate are serious cosplayers and Doctor Who/Star Trek fans to the nth degree. Not only that, they have some really serious patterns that take so much care into replicating the on-screen originals. At the beginning, I noticed the pattern didn’t have an inventory of the pieces, so Alex kindly sent me one basically instantly. This was my cut inventory that included 37 pieces to cut, some multiple times from multiple materials!:
I hesitated for months on buying the pattern because it’s $35 plus some not cheap shipping! But in the end, it was absolutely worth the money. The pattern itself is kind of a primer on tailoring. There were excellent instructions on handling the hair canvas and padstitching and matching all of the pinstripes. Plus, if I had decided to modify a pattern to match the onscreen details, it would have added a whole lot of guesswork and time into what was already a long project.
It took me 9 days to make the suit! Tailors, you have my complete and utter respect. Forever. Some of those days were rather long, and I had to break it up so that I wouldn’t be overwhelmed by the enormity of it all. The directions also help spur you along with funny bits like this from the tailoring fronts step:
Be careful not to overdo it, though – you don’t want to shape the roll line into much of a curve! (That is, unless you have awesome Ricardo Montalban pecs!)
I laughed long and hard over that one.
Tailoring
Padstitching
As I said, the pattern gave some really good directions for tailoring and linked to videos where appropriate. This was my first go into padstitching, and after having some initial trouble, I found it kind of magical to watch all those tiny stitches start to add shape to the flat fabric. I did choose to use some random wool for the undercollar instead of the undercollar felt recommended in the pattern. I’m guessing that the undercollar felt is slightly less bulky than my felt-ish kind of wool coating. In the end, I had to cut a pinstriped undercollar to cover over the wool just to make sure that the wool would not peek out on the underside of the collar.
Hair canvas
I have never worked with hair canvas before and I learned a lot about it in the process. The fusible hair canvas from Fashion Sewing Supply was definitely worth the extra $1/yd for the time that it saved me in being able to fuse the fronts vs. hand baste them in. I know there’s a way to shape everything with fusibles and without all of the padstitching, but I couldn’t find my speed tailoring video. It’s sadly been missing since I bought it.
When cheaper is actually a lot better!
The other thing I learned about hair canvas is that the good stuff (like what Pam sells) is super wide. Her fusible hair canvas is 68″ wide! I had another yard of hair canvas from someone else and it was only 20″ wide, which is only useful if you’re going to be using it for an undercollar.
This suit required hair canvas for the fronts, undercollar, and bias strips in all of the hems. 1 yard of the 68″ wide stuff was more than sufficient. I could probably get another jacket out of it. The 22″ wide version did not fuse as well and I’d have to buy probably 4 yards because of the size of some of the pieces. So even though initially $21.95/yd plus not cheap shipping seems steep, the 20″ wide version at $14/yd is by far much much pricier and not as good of a product.
Muslin
So initially in my muslin, I had to add a little bit in the back shoulders for my husband’s slightly broad back. He also has a very straight upper back that required a horizontal dart. No wonder he doesn’t find suits comfortable–both of these issues are not something you can buy off the rack, leaving you with some tight, restrictive backs.
I did do myself a disservice on the pants muslin in that I eliminated the pockets. The muslin process got rushed because of a business trip, so I skipped the hip pockets. Since I was rushed, I didn’t notice the extra stress across the high hip that needed some extra width. With the pockets in there, I would have seen it immediately when the pockets did the poof out thing that hip pockets do. Do you know when I noticed that? Yeah, when the pants were already done. *insert many pots of tea with a side of seam ripper*
The trousers
Fixing the pants
To fix the fit issue on the pants, first the waistband came off. Then I opened the side seams. I cut strips from the selvedge edges and zigzagged them over the original serged edge of each side seam part. Thankfully I had finished the front and the back seam edges separately.
With the extra fabric in the side seams, it was safe for me to move the seam line all the way to edge of the serged line without having to worry about the seams getting too stressed by the lack of fabric in the seam allowance.
Hip pockets = face palm
The other issue with the hip pockets was the tiny skinny facing. Unless you have chicken legs, there’s like no chance that the inside of the pocket is not going to show on the final pants. Sure enough, all I saw was the inside of the pocket initially.
You thought ripping out side seams to add width was a project? Well, ripping out the entire pockets to take out the facings and add wider ones was a mountain. One that was not fun to climb. Still, sometimes struggle is just part of the process. I set aside the pants for a couple of days which was enough time to get over the frustration of not getting it right the first time.
The prettiest waistband facing ever.
This is just lovely guts. Lovely. The pattern had you make the facing suggesting an upcycled men’s shirt because of the ease of finding a good stripe vs. finding yardage of the perfect fabric. Ribbon is then suggested for the contrast stripes. I used seam tape and maroon cotton bias tape that I made.
Jacket
Pretty pockets
For all the struggle with the hip pockets, all of the other pockets worked out quite well. There’s 2 double welts on the back of the pants, 2 double welts on the lining of the jacket, and 1 pleated pocket with a really handsome flap on the front of the jacket.
My favorite pockets dthough are the 2 hip pockets on the jacket. They’re kind of their own category. The construction is basically a single welt pocket, but the flap folds down not up to cover everything like a typical single welt would. So it’s a faux flap pocket that opens from the top–interesting and very fun to sew. Deep and cozy, with perfectly matched pinstripes, I’m really, really proud of these pockets.
Back waistband
The back waistband above the vents along with the front pockets are the really distinguishing details that set apart David Tennant’s 10th Doctor’s jacket from the other doctors. If you took these details away, this pattern could easily become a regular suit pattern. I could bore you with a lot of production shots of David Tennant’s jacket, but I’ll point you towards Alex’s excellent analysis of the whole costume.
Also, Nathan had too much fun with blipping everything with the sonic screwdriver.
Will I make another suit?
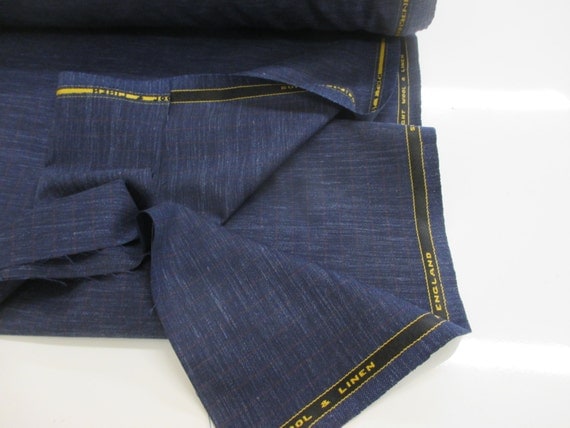
No. Not today. But probably. Eventually. A girl needs to recover from the experience! The 10th Doctor also wears a brown suit, and no doubt my navy/white pinstripe is not as true to the original teal-ish navy with red pinstripes.
Now that I know exactly how much fabric I need for the whole project, I feel more confident searching around on Ebay for the right fabric. I wish I had found this one first:
Baby Dalek
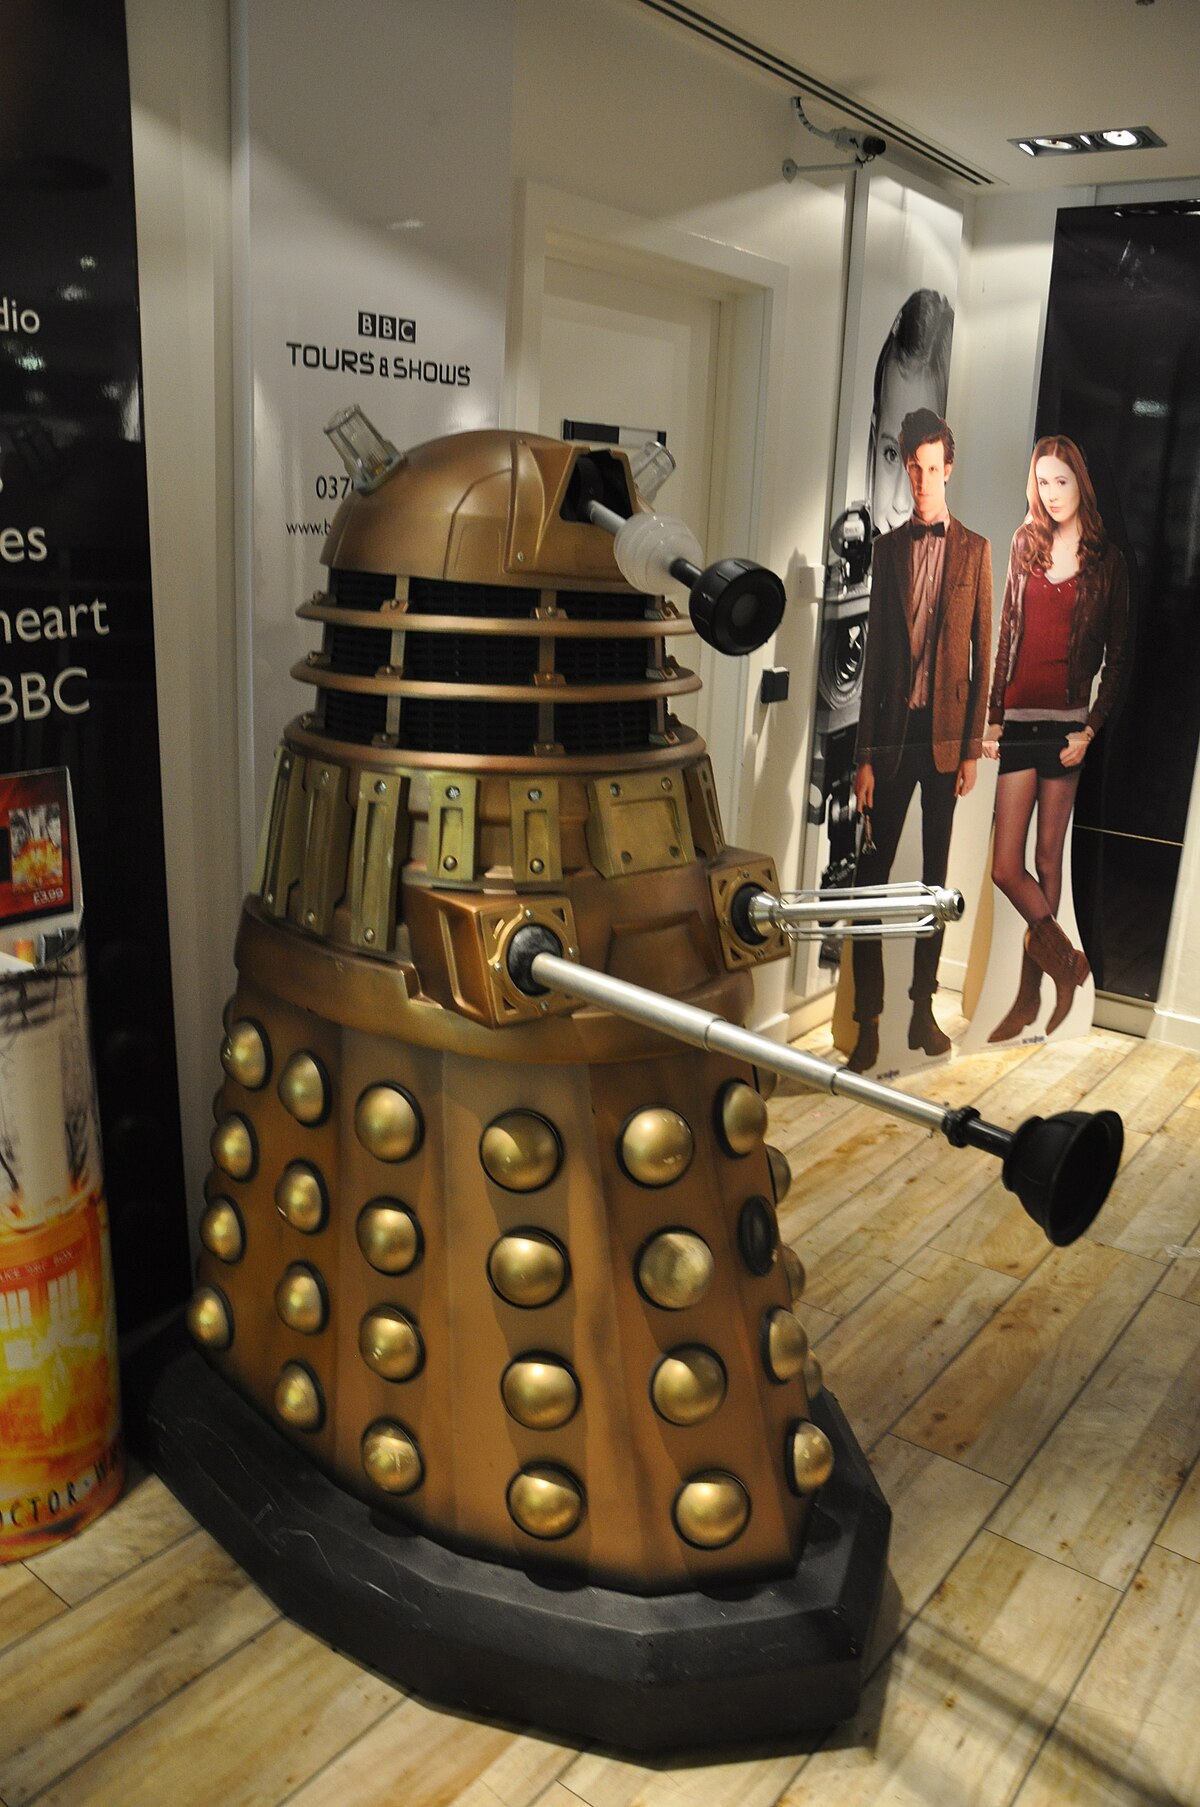
So to complete our Doctor Who themed Halloween, my husband and I collaborated on a Dalek costume for our daughter. Daleksare probably the most iconic Doctor Who monsters and sworn enemy of The Doctor. They are squishy squid like creatures with one eye and giant brain heads who live within the armor of a robot-like device. They are bent on destruction of all life that’s not a Dalek. Their tagline is “EXTERMINATE!!!!!”
So, basically, it’s totally appropriate for a little girl, right?
Costume part
Tentacle skirt
I found this tutorial which I more or less followed. The idea of the tentacles being a big stuffed circle skirt I thought was smart. I did add an elastic covered waistband to make it better in terms of an actual garment. I used an coral/orange ponte and a pink pique.
It took a lot of coaxing to get baby girl to wear the tentacles. She was convinced for a while that they were going to eat her. Once she realized that she could fake attack people with them, she was entertained endlessly. Also, Daleks like graham crackers. And pretzels (note the bag).
Cyclops onesie
Since the Dalek’s eye is pretty much in the middle of their bodies, I thought a onesie would be the easiest way to put it on a costume. I sewed the eye from layers of felt, ponte, and clear vinyl. I stuffed it a little bit than hand stitched it to a basic long sleeve pink onesie. This was easily my daughter’s favorite part of the costume.
Brain hat
To top off everything, I made a basic beanie from the ponte from SEWN Hats. To add the brainy bits, I cut long tubes from the pique and made a kind of wide piping out of it. As the piping was going through the machine, I stuffed it with polyfil to give it dimension. Originally I tried adding parachute cord as stuffing, but it wasn’t dimensional enough. I could have sewn the brain bits in place, but I grabbed a glue gun. Fast and dirty sometimes does the trick!
Robot housing
[smbtoolbar]
My husband built the housing for the Dalek around our much loved, more used umbrella stroller that lost it’s umbrella years ago. There’s cardboard, styrofoam, plungers, egg beater, pool noodles, rubber ball eye, and a lot of spray paint. The Dalek can be closed (with baby inside! What an odd game of peekaboo we had!) or opened in the center to show the Dalek.
The whole situation garnered a lot of attention on our block on Halloween and at the Trunk or Treat we went to at my son’s preschool. My husband claims that he’s not at all creative, and yet, he comes up with some pretty amazing things like this when it comes to the kids kind of regularly.
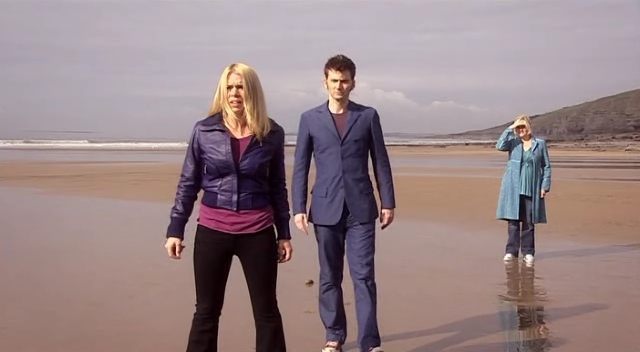
My youngest son’s lion costume made an appearance with new pants that I sewed last minute, and I also donned my Rose Tyler jacket for some comedic attempts at recreating the scene from “Journey’s End”.
For people who don’t really get into Halloween too much aside from strolling our block, we kind of went all out this year.
Elizabeth Farr is the writer behind the Elizabeth Made This blog where she shares helpful sewing tips, step by step sewing tutorials and videos to help you explore your creativity through sewing. She has written sewing Eguides and patterns, been a featured teacher at Rebecca Page’s Sewing Summit and Jennifer Maker’s Holiday Maker Fest and her work has appeared in Seamwork and Altered Couture magazines. She also created a line of refashioned garments for SEWN Denver. When her sewing machine isn’t humming, she’s playing and teaching violin, and hanging around a good strategic board game with her husband and 4 kids.
Very impressive all around! While your husband suit is the kind of tailoring that I dream of trying it one day for mine I am totally hooked on the brain hat! It is so awesome! You all look very cute!
Wow, Elizabeth! You amaze me! That suit looks so authentic from over here, and I love the two hip pockets on the jacket, and the gorgeous waistband, both inside and out. I cannot imagine doing all of that detailed sewing THEN making the tentacles THEN coaxing your reluctant girl into wearing them, LOL! So worth it though, and the brain hat is too hilarious. You’ll have those costumes and memories forever. But now, for some easy, simple sewing, eh?
Thanks Linda! I actually did the Dalek early on because I knew I’d be flagging. It came after the pants and it was a welcome break in the action. We’ve all been wearing the brain hat it’s so silly! You’re right, the last couple weeks have been nothing but grab the quickest fastest project imaginable!
Thanks Kathy! It does feel like an accomplishment for sure to get through such a big project–like the 1st time you make a pair of jeans or something of that magnitude.
Wow! Just literally AAAMAZING! If you did no other sewing this year, you’ve ended the year with a huge BANG! I love what you’ve created for your family and you’ve out done yourself my friend!
Thanks Myra! Like I said, we don’t really do much Halloween celebrating, but we both really wanted to go big this year. Sometimes it’s what you do! Ah, but I DO have to get through my project for That Sewing Blab! I can’t wait for Tuesday! My package is still safe up on the bookcase.
That doctor suit is amazing, but nothing compares to that adorable Dalek! You’ll have to find every excuse to dress your family up in these awesome costumes as often as you can…so much work!
Thanks Katherine! The Dalek kind of has my heart, especially when we tried to get her to say EXTERMINATE! and she quipped back with “Cracker?” Oh, all the heart eyes and laughs forever! I think you’re right though–we’ll have to invent excuses to dress up!
I’m finally getting over here to comment! You and your family are SO AWESOME! I really do hope you take this show to a con. Maybe the boys will also want to join in with some Doctor Who cosplay, too? I’ve never heard of that pattern company, but GAHHHH!!! they put Khan in the instructions! Your husband’s suit turned out so good and well worth the effort. You two are perfection, but of course, I am just bonkers over your baby dalek. I’m so glad she enjoyed it after a while. You are both so inventive to create that. I almost want to make one for my dog, but I don’t think he’d sit in it very long…. Love this post to death!!! <3
Thanks Tanya! It was amazing to see everything come together for this project–it was a long time in planning, and the baby Dalek turned out better than I think either of us ever thought. And I just might plummet headlong into tailoring, it’s so fascinating!
The boys are already talking about joining in. I think a collection of doctors could be fun, although I know at least 1 of my guys really wants to be a Cyberman (such a tough build to get right!). My husband has family in San Diego, so who knows! We’ll probably stick to the local con here.
Weren’t your fingers sore after all that pad stitching? I know mine would have been. You certainly pulled out ALL the stops on this suit tailoring job! And there should have been a prize for your families costumes!
They were absolutely sore! I can’t abide traditional thimbles, but I did buy a leather sashiko thimble after I finished for the next time I padstitch. I really love the process of the handstitching. As fast as I like to sew in general, I love the quiet beauty of handstitching and watching fabric come into shape. It was a fun Halloween for us!
This is so good! I’m impressed at the amount of work that went into the suit, and I hope your husband can find other opportunities to wear it. And your baby Dalek is just the cutest!


Wow 3 cheers for you ( hubby too) a lot of work went into these “costumes”. They & you all look fabulous.
Becca
Thanks Becca! It was indeed a lot of work, but it was a lot of fun along the way. The end result was absolutely worth it too. Thanks for reading!
Very impressive all around! While your husband suit is the kind of tailoring that I dream of trying it one day for mine I am totally hooked on the brain hat! It is so awesome! You all look very cute!
Thanks Georgia! I love the brain hat too–it’s very very silly! You would do so well with the tailoring with all of your skills!
Wow, Elizabeth! You amaze me! That suit looks so authentic from over here, and I love the two hip pockets on the jacket, and the gorgeous waistband, both inside and out. I cannot imagine doing all of that detailed sewing THEN making the tentacles THEN coaxing your reluctant girl into wearing them, LOL! So worth it though, and the brain hat is too hilarious. You’ll have those costumes and memories forever. But now, for some easy, simple sewing, eh?
Thanks Linda! I actually did the Dalek early on because I knew I’d be flagging. It came after the pants and it was a welcome break in the action. We’ve all been wearing the brain hat it’s so silly! You’re right, the last couple weeks have been nothing but grab the quickest fastest project imaginable!
This is incredible! Congratulations on such an accomplishment!
Thanks Kathy! It does feel like an accomplishment for sure to get through such a big project–like the 1st time you make a pair of jeans or something of that magnitude.
Wow! Just literally AAAMAZING! If you did no other sewing this year, you’ve ended the year with a huge BANG! I love what you’ve created for your family and you’ve out done yourself my friend!
Thanks Myra! Like I said, we don’t really do much Halloween celebrating, but we both really wanted to go big this year. Sometimes it’s what you do! Ah, but I DO have to get through my project for That Sewing Blab! I can’t wait for Tuesday! My package is still safe up on the bookcase.
That doctor suit is amazing, but nothing compares to that adorable Dalek! You’ll have to find every excuse to dress your family up in these awesome costumes as often as you can…so much work!
Thanks Katherine! The Dalek kind of has my heart, especially when we tried to get her to say EXTERMINATE! and she quipped back with “Cracker?” Oh, all the heart eyes and laughs forever! I think you’re right though–we’ll have to invent excuses to dress up!
Super fun for your family and everyone who saw you all on the street. I cannot wait to see what you come up with for next year!
Thanks Eileen! It was a good time for all of us. I have no idea how we’ll follow it up, LOL!
Just say WOW! Awesome! Especially, that suit is super cool. These pics make everyone happy. Congratulations!
Thanks Eli! It’s was wonderful to see the whole vision come into being. We had a great time!
I’m finally getting over here to comment! You and your family are SO AWESOME! I really do hope you take this show to a con. Maybe the boys will also want to join in with some Doctor Who cosplay, too? I’ve never heard of that pattern company, but GAHHHH!!! they put Khan in the instructions! Your husband’s suit turned out so good and well worth the effort. You two are perfection, but of course, I am just bonkers over your baby dalek. I’m so glad she enjoyed it after a while. You are both so inventive to create that. I almost want to make one for my dog, but I don’t think he’d sit in it very long…. Love this post to death!!! <3
Thanks Tanya! It was amazing to see everything come together for this project–it was a long time in planning, and the baby Dalek turned out better than I think either of us ever thought. And I just might plummet headlong into tailoring, it’s so fascinating!
The boys are already talking about joining in. I think a collection of doctors could be fun, although I know at least 1 of my guys really wants to be a Cyberman (such a tough build to get right!). My husband has family in San Diego, so who knows! We’ll probably stick to the local con here.
Weren’t your fingers sore after all that pad stitching? I know mine would have been. You certainly pulled out ALL the stops on this suit tailoring job! And there should have been a prize for your families costumes!
They were absolutely sore! I can’t abide traditional thimbles, but I did buy a leather sashiko thimble after I finished for the next time I padstitch. I really love the process of the handstitching. As fast as I like to sew in general, I love the quiet beauty of handstitching and watching fabric come into shape. It was a fun Halloween for us!
This is so good! I’m impressed at the amount of work that went into the suit, and I hope your husband can find other opportunities to wear it. And your baby Dalek is just the cutest!
Thanks Becky. I hope so too! We’re both so happy with the Dalek and it was even more fun that in the end she really enjoyed it as well.