


Table of Contents
Setting up your ice dye station
Ice dyeing is perfect for outside, though you can work in a garage too.

Set out a tarp, then put your tub on top of it. If you’re using a tub/cookie rack combo, set the rack inside the tub. If the rack doesn’t sit very high off the surface of the tub, prop up the corners with something. You could use just about anything from clean yogurt containers to little blocks of wood.
It’s kind of nice if you have a rack that’ll fit inside your tub of choice. This one is a little too small. It still works, but when the rack is inside the tub, you can pile on the ice a little more easily.
Scrunch up fabric

Next take your soda ash-soaked fabric and scrunch it up. You can ball it up, twist it, pleat it. Play around with this. How you scrunch it up is going to affect the overall pattern in the print.
Ice your fabric

Now pour some ice over the top of the fabric. Use the ice straight from the bag or your freezer, or blitz the ice for a few pulses in a blender before you put it on the fabric. The ice will make different shapes on the fabric as it melts in the dye, so the starting shape of the ice can make for a different look.
You can add a lot of ice or a little at first and add more later. There is literally no wrong way to do this!
Sprinkle on dye

Put on your dust mask, then use a spoon to sprinkle one of your dye colors over the ice. The colors will be intense at first, so *sprinkle* like you were salting a piece of food, don’t dump the dye.
Put different colors over different areas of the ice. You can make a pattern out of your sprinkling, or you can add the color at random.
Sharing is caring. Share this post with a friend by clicking on the buttons below.
[addthis tool=”addthis_inline_share_toolbox_jb3t”]
Layer the ice and dye
I like starting with a little ice and dye, then wrapping and scrunching more fabric on top of it. Then I layer more ice and dye.

I’ll say it again, there’s no wrong way to do this. It’s all an experiment and you’ll be totally surprised by the results no matter what.
Let the ice melt
When you’re satisfied with your layering of the ice and dye, reach into the tub with your gloves on and gently stir everything around a little bit.
Cover everything with a piece of plastic wrap and set it aside to let the ice melt. 24 hours is a good amount of time to wait, but don’t set it and forget it.
Periodically check to make sure that the drain water is sitting below the level of the fabric. You don’t want the fabric sitting in the melted ice water or it’ll be a big muddy mess. Pour off any water that’s getting too close to the fabric. Probably you’ll need to drain off the water at least once in the 24 hours.
Rinsing your fabric
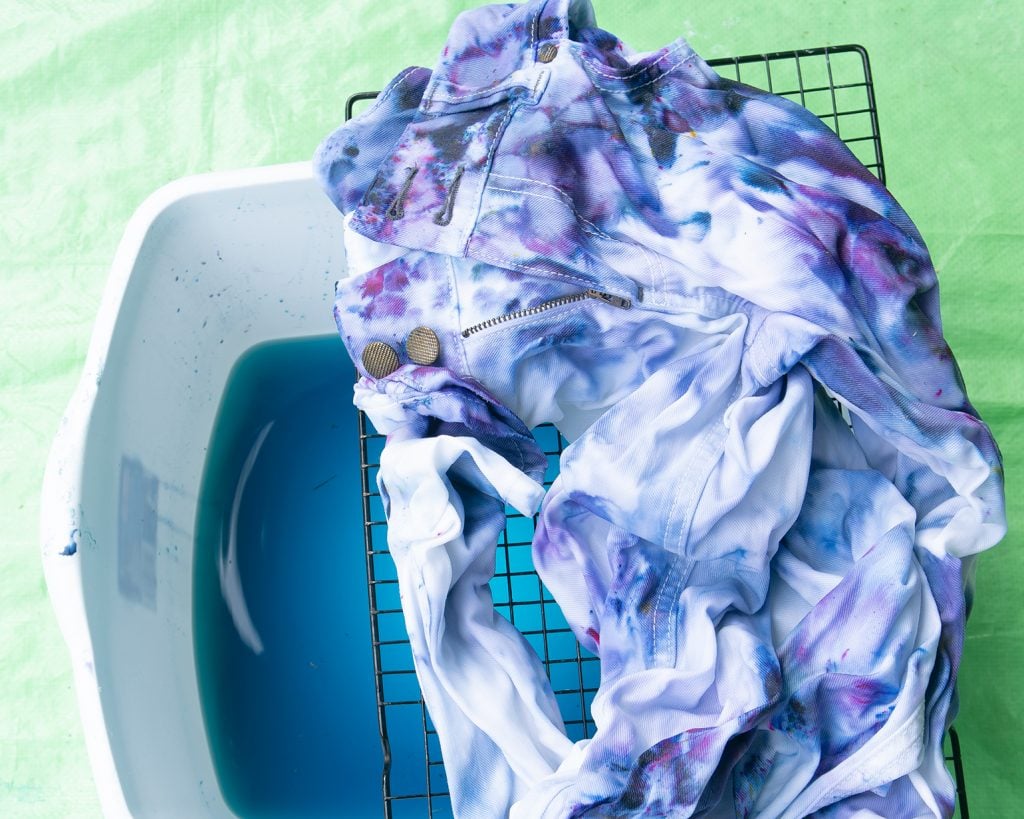
Okay, moment of truth time. Pull the fabric with your gloves out of your tub and unfold it. It’s going to look a little scary. Don’t fret!
Take it to a sink and rinse the fabric in cold water until it’s almost clear. Pour off the extra water from your tub and give the tub a quick rinse.
Wash on a hot cycle
Use the tub to transport the fabric to a washing machine so keep the mess contained.
Finish up the fabric by washing with detergent on a hot cycle in your washing machine. Dry as you would normally. And then you can do whatever you’d like with your new fabric!

So that’s how you ice dye. Now you know what fabrics and dyes are perfect for ice dyeing, and you can see that it’s a really fast and easy dye process that’s perfect for summer.
Bonus: It’s actually one dye project that I would recommend for kids too since there’s no hot dye involved. Plus seeing all of the patterns that the melting ice makes can be a good STEM lesson for kids!
Display your gorgeous new ice dye fabric with this super simple DIY Ice Dye Pillow.
For a deeper dive into ice dyeing complete with a full video tutorial, FAQs and ideas of what you can do with your ice dyed fabric, take the free Ice Dye Mini Course. Just sign up below:
What will you do with your ice dyed fabric?
Check out more DIY dye processes:
Your guide to overdyeing fabric
You don’t always have to start with a blank slate when you dye. Here’s how to dye over colored fabric for a fresh look.


Elizabeth Farr is the writer behind the Elizabeth Made This blog where she shares helpful sewing tips, step by step sewing tutorials and videos to help you explore your creativity through sewing. She has written sewing Eguides and patterns, been a featured teacher at Rebecca Page’s Sewing Summit and Jennifer Maker’s Holiday Maker Fest and her work has appeared in Seamwork and Altered Couture magazines. She also created a line of refashioned garments for SEWN Denver. When her sewing machine isn’t humming, she’s playing and teaching violin, and hanging around a good strategic board game with her husband and 4 kids.
Wow! Neat process, Elizabeth! I love the outcome!
Thanks Carrie! Definitely a fun summer project!
Love it- thanks!
You’re welcome Mina!
Oh Elizabeth! You always do such amazing things with dye! I love it! Those jeans are gorgeous! The coloring is fabulous! And you are such a sweetie to share your process with others! If I ever decide to dye something again, I will definitely be coming to you for actual guidance! Thank you so much!
Thanks Myra! Ice dyeing is a great place to start–super simple with high rewards. And I’m so happy to be your dye coach anytime!
Love it! What colors did you use to make yours? I tried to click on the link you provided, but that dye set is no longer available.
Shoot, it looks like Amazon doesn’t have anything similar. I’ll working on finding a similar starter set. For myself I order from Dharma Trading as they have the widest color selection available. These samples are mostly: Wisteria, Sea Glass, and Wedgewood Blue.
If I remember correctly I used sea glass, wisteria, and Wedgewood blue from Dharma Trading.
Quick question: I am getting ready to ice dye, really intrigued with it. Dharmas tutorial says 2 cups of soda ash per gallon-yours says 1. What is the difference do you think? What does soda ash do? 🙂
Soda ash helps the dye adhere to the fabric. I wouldn’t dye anything without a soda ash soak first.
Absolutely.
I tried your Ice Dying method Summer 2021. I loved it! It was so easy and the surprise at the end was great.
You never know when dying clothing, how it is going to turn out and with the Ice Dying Method…well, anything can happen.
I made 2 T-shirts for my daughters in Texas. When visiting them that fall, I gave the shirts to them and they loved them too. My Son-In-Law liked them too so, I am going to make him one. Yes, it is fall of 2022, I’m a bit behind on my projects.
The ease and beauty of this method of dying clothes and fabrics is great.
Thank you for turning me on to this.