
I’ve always been amazed by how many people shudder at the thought of sewing buttonholes. Maybe it’s that buttonholes are often the last thing you sew.
You’re 90% through a shirtdress, mentally already wearing it, and then you have to hold your breath hoping that the buttonholes turn out well?
The truth is that sometimes buttonholes are jerks, but getting lovely, functional buttonholes doesn’t have to be a matter of hoping.
Let’s walk through some tips that will help you sew beautiful buttonholes every time. No more teeth gritting with your buttonholes now!

Table of Contents
Interface your buttonhole area
All buttonholes need interfacing. Buttonholes have a lot of dense stitching, and without interfacing you’ll get a sad, puckered buttonhole.
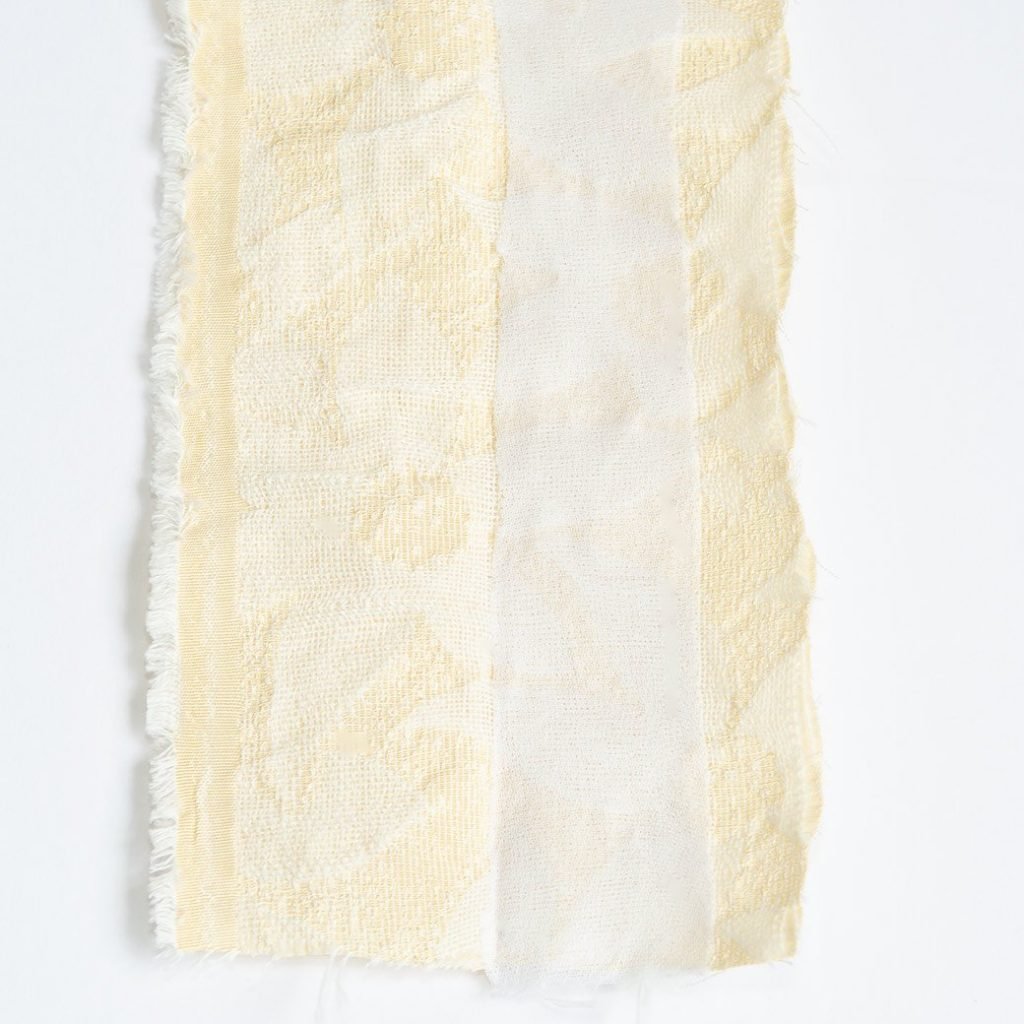
How sad, you ask? In the interest of science, here’s a buttonhole sans interfacing vs. one with interfacing.

The interfacing will also help the fabric maintain some integrity as you’re buttoning and unbuttoning your project.
Use good quality interfacing in facings or buttonbands and you’re 1 step closer to a pretty buttonhole.
elizabethmadethis.com is a participant in the Amazon Services LLC Associates Program, an affiliate advertising program designed to provide a way for websites to earn advertising revenues by advertising and linking toSome of the links below are affiliate links. This means that, at zero cost to you, I will earn an affiliate commission if you click through the link and finalize a purchase.
Use good tools
Another thing to do to sew better buttonholes is to use good tools. Here’s a good tool arsenal for buttonholes:
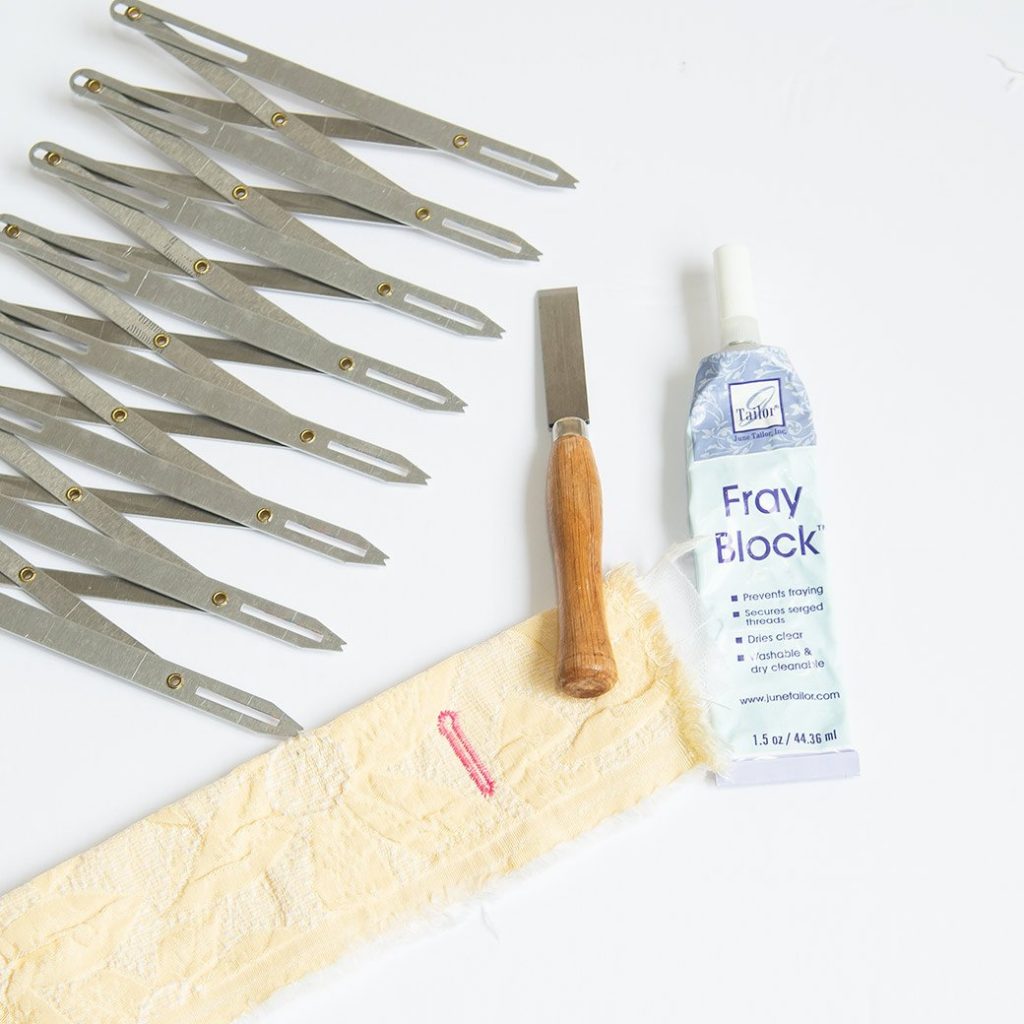
- Simflex: The Simflex expanding gauge helps measure and mark between buttonholes evenly.
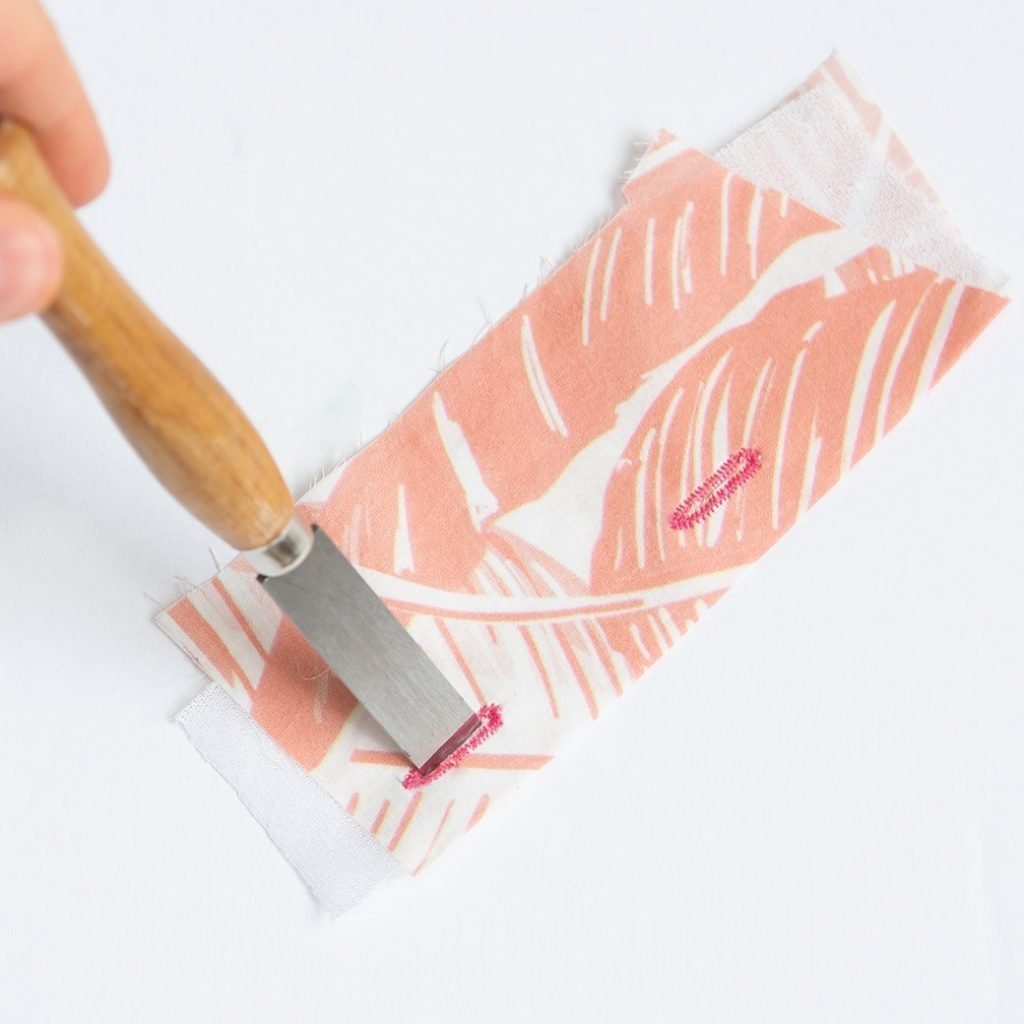
- Buttonhole chisel: This will help you cut open buttonholes without the danger of cutting too far and ruining a buttonhole. A good buttonhole chisel also cuts open buttonholes more cleanly than a seam ripper.
- Fray Block or Fray Check: Apply one of these to your stitching for a buttonhole that will not fray on you. Fray Block is my personal choice. It’s great for keeping the threads on the interior of the buttonhole from looking shaggy.

Use a buttonhole attachment
Most sewing machines have buttonhole feet or attachments for making buttonholes. And nowadays, most home sewing machines have 1-step buttonhole stitches.
The idea is that you pop a button in the back which will automatically set the buttonhole to the right size for that button. Then when you switch to your buttonhole stitch, you just stitch and go.
Do use the buttonhole foot specifically for your machine. Once I bought a generic foot just to try it out. My Janome was having none of it. I ripped out 100% of my buttonholes one day before I went back to the Janome foot without trouble.
Make test buttonholes
It’s always good to make a test when you’re sewing buttonholes.
A test buttonhole can help you decide on thread colors, adjust tension. It’s also good to know how long a buttonhole will be for a given button.
Sometimes on a bulky fabric you’ll need to stitch out a buttonhole from a different direction than the rest of them. Knowing exactly how long your buttonhole will be can help you mark the exact stopping point. Otherwise, you might stitch too far or risk getting your foot stuck.
Make a little sandwich of two layers of your fabric plus interfacing and stitch out a buttonhole. Inspect your little sample and use it as a double check for your markings.
Adjust your tension if needed
Speaking of tension, does it look nice on both sides? Make a couple buttonholes on your test scrap.

Wherever your tension is normally set, make a test with slightly higher tension and slightly lower tension. Does one improve or look worse? This can help you find a good setting for this particular fabric.
Should you sew buttonholes first?
This is a preference, but it’s something to consider.
Think about that scenario at the beginning–the one where you’re 90% done with your project and all that’s left is buttonholes.
How fresh is your mind? How willing are you to cut corners or speed through so you can just.get.done?
Is there a way you can sew your buttonholes earlier in construction?
This might be a good choice if you’re using a pattern you’ve sewn before. If you’re confident with the placement of your buttons, sewing the buttonholes into a band before sewing on the band can potentially help you avoid that annoying problem of your foot getting stuck.
Press the fold of your band and mark your buttonholes. Stitch out the buttonholes, then sew on the band. This may not be the best for all styles and fabrics, but it’s definitely an option to keep open!
Grade your seams
Buttonhole feet do not like running over bulk. It sets the foot on uneven footing and you’ll end up with buttonholes that get either totally stuck, inconsistent, or partially sewn.
Help out your foot by grading the seams around the buttonhole area.
Keep your buttonhole foot level
This goes along with grading your seams. When you’re sewing buttonholes, make sure that your foot is level.
Sometimes even when you’ve graded a seam well, your foot can get caught up and get pitched to one side.
Help out your foot with a scrap of fabric. Fold up a scrap of your fashion fabric and put it under the foot on the non-level side. The buttonhole foot will have a much easier time gliding along now.
Use water soluble stabilizer for textured fabrics
It can be hard to sew buttonholes in bulkier, textured fabrics. Your foot might not want to travel across all that beautiful texture.

One of the things that you can try is stitching your buttonholes through water soluble stabilizer.
Solvy is one of my secret weapons for nice buttonholes. Cut a little rectangle of the Solvy that’s big enough to make a little sandwich with the fabric.

Stitch the buttonhole through the fabric and the two layers of Solvy. The foot will glide along the Solvy. To remove it, rip away the extra stabilizer on the finished buttonhole. After that you can run the buttonhole under water to remove the remaining stabilizer.
Sew into the bulk
Ugh buttonholes on collars! I have ripped out SO many buttonholes on collars. It’s such a tight spot to navigate, that all the grading and keeping feet level can still end in frustration.
That’s because starting a buttonhole right on top of the bulk can get the foot stuck.

You remember that test buttonhole you made earlier? Pull it out and cut around it.
Next, mark the end of the buttonhole not at the edge of the collar, but working outward towards the edge of the collar. When you sew your buttonhole, start from this point. Stitch towards the edge of the collar, and you’ll have a much better shot at a good buttonhole.
Stitching into the bulk works well on the top buttonhole on button bands as well as on jeans waistbands and even shirt cuffs.
Your seam ripper is not your enemy
Even with doing all of these things, you probably will have a buttonhole or two or several that’ll go wrong on you. Do you know why I have these thoughts about buttonholes in the first place? It’s because I’ve sewed a lot of bad bad buttonholes.
If you sense a disturbance in the force while you’re stitching out a buttonhole, stop. Don’t keep stitching.
Pick up your seam ripper and carefully slice through the looped stitches on the back side.
If you do this, the rest of the stitches should pull out easily and rarely with any damage to your fabric.
Assess what happened and try again. You’re never be a failure for having to pick up your seam ripper. You’re only a failure if you give up.
With these buttonhole sewing tips you’ll be feeling more confident the next time you need to sew a row of buttonholes. A little practice and that moment where you look at your machine and say, “I’m the boss of you” you’ll be on your way to buttonholes you can be proud of.

Elizabeth Farr is the writer behind the Elizabeth Made This blog where she shares helpful sewing tips, step by step sewing tutorials and videos to help you explore your creativity through sewing. She has written sewing Eguides and patterns, been a featured teacher at Rebecca Page’s Sewing Summit and Jennifer Maker’s Holiday Maker Fest and her work has appeared in Seamwork and Altered Couture magazines. She also created a line of refashioned garments for SEWN Denver. When her sewing machine isn’t humming, she’s playing and teaching violin, and hanging around a good strategic board game with her husband and 4 kids.
That idea of doing the buttonholes beforehand could be a game-changer once I’m confident the placement is correct! My mom was so afraid of buttonholes she always got my father to do them – he approached it as a problem to be solved calmly and rationally; she viewed them as a frightening menace that could ruin her whole project! Great article – thanks!
You definitely can do buttonholes beforehand!
TY for this post! I’m definitely in the “I-wonder-if-the-buttonholes-will-turn-out-nicely-this-time?” camp, lol.
My three main takeaways to attempt on my next project: 1) Use interfacing! 2) Use fray check/block, and 3) Make the buttonholes beforehand.
Your quote, “I’m the boss of you” made me chuckle!