

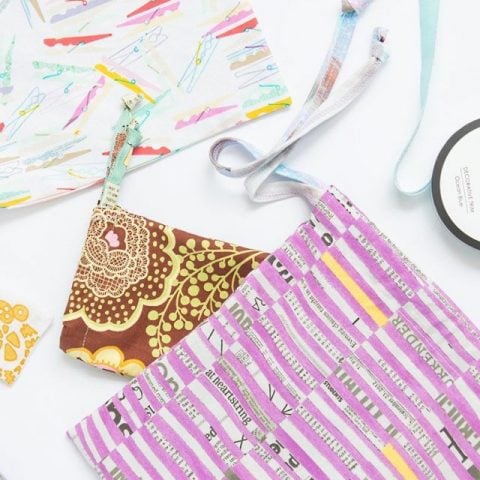
We’re going basic today as I show you how to make a drawstring bag. I love simple drawstring bags!
They’re a great leftover fabric project, they’re quick to make. Best of all, it’s simple straight line sewing, so this is an awesome project for beginners. Shoot, you can make them with your kids so they can get their hands used to using a machine.
Plus drawstring bags are super versatile. Here’s a few things you can use a simple drawstring bag for:
- gift bags
- lingerie bag for the wash
- protect a favorite pair of shoes in your suitcase
- hold your glasses
- a gift card holder
- soap mitt
- lip balm holder
- drawstring backpack
- simple diy project bags for knitting or crochet
So let’s walk through the basic drawstring bag tutorial, then I’ll show you how to make an even easier version with washcloths.
Dig you up some cute cotton and let’s get going.


elizabethmadethis.com is a participant in the Amazon Services LLC Associates Program, an affiliate advertising program designed to provide a way for websites to earn advertising revenues by advertising and linking toSome of the links below are affiliate links. This means that, at zero cost to you, I will earn an affiliate commission if you click through the link and finalize a purchase.

Cutting your fabric
To start off, you need to cut 2 rectangle pieces for every bag you’re making. Here’s 4 sizes to choose from, although note that you can cut 2 larger rectangles if needed.
| Itty bitty | 2″x3″ | Cut 2 |
| Small | 5″x8″ | Cut 2 |
| Medium | 8″x10″ | Cut 2 |
| Biggerish | 9″X11 | Cut 2 |
What types of drawstrings do I need?
You can use just about anything for a drawstring. The point of the drawstring is so that it gathers the top of the bag when you pull on it. That’ll keep everything you’ve put inside the bag secure.
Twill tape works well for drawstring bags like this, though I really like foldover elastic as well. Foldover elastic is very soft and it ties into a good secure knot. Other choices for drawstrings include ribbon, bias tape, leftover fabrics, knit fabric, clothesline, paracord and the list goes on.
Here’s how to make a drawstring for an extra DIY touch.
For each bag, you won’t need more than a yard of your chosen drawstring material. For the itty bitty size, a few inches is all you need.
How to sew a drawstring bag
First things first, place your fabric right sides together and sew down one side with a 3/8″ seam allowance. Press the seam.

Finish off the seam with a zigzag stitch or a serger if you have one.
Make the casing
Next you need to make the casing. The casing is the part of the top of the bag that the drawstring gets threaded through later on.
First press 1/4″ the top edge of the bag towards the wrong side. After that, fold down 3/4″ more of the top edge. You’ll see a 3/4″ wide band of the fabric on the wrong side now.

On each side, make a 3/8″ clip right at the bottom of the folded fabric.
Unfold the fabric and press back 3/8″ towards the inside of the casing.

Stitch this little piece of fabric down with a zigzag stitch (5.0 mm width, 1.5 mm length).
Finish off the casing by folding back the pressed edges as they were. Stitch down the casing close to the pressed edge.

Sewing the drawstring bag body
After this, you’re almost done. I told you this was a super easy drawstring bag tutorial!
If you like, you can serge around the sides and bottom of the bag now. It makes for a little cleaner finish, but if you don’t have a serger, no worries.


Either way, fold the sides of the bag right sides together. Sew across the bottom of the bag and the sides with a 3/8″ seam allowance. Backstitch at the beginning and end of this seam.
When you get to the bottom of the casing, stitch right into that clipped edge and into the casing by a stitch.
If you didn’t serge the edges, go ahead and finish off the seam with a zigzag stitch.
Finishing the bag
From here, flip the bag to the right side. Use a chopstick and your fingers to tease out the corners.
After that, grab your elastic threader. Thread it through the casing.

Next, thread the eye of the elastic threader. Pull the drawstring back through the casing.
Tie the ends of the drawstring together in a nice secure square knot.
To keep the drawstring from falling out, stitch through the casing along the top side seam. This will anchor the drawstring inside the casing and save your sanity later.

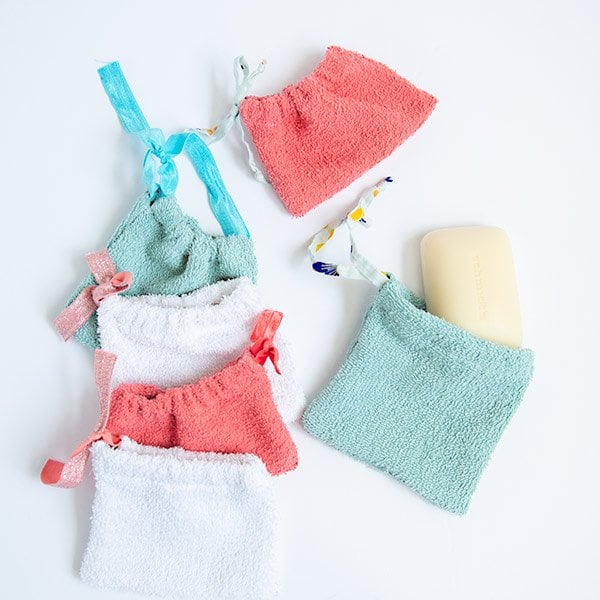
3 minute washcloth drawstring bag
Now for an even quicker drawstring bag variation made from washcloths.
Use these for new babies. They’re simple little washing mitts you can pop over your hand. You can also slip in a bar of soap and it makes an easy little washcloth for kids to use. The foldover elastic even acts as a hanging loop inside the bath for easy storage.
Now how to make it.
How to sew a washcloth drawstring bag
First, fold a washcloth in half. Cut along the fold. Pull off or cut the tag too.

Next, press 3/4″ to one side of the washcloth.


Stitch right down close to that finished edge of the washcloth.
After that, fold the wrong sides together and stitch from the bottom of the casing down the sides and the bottom with a 3/8″ seam allowance.
You only need to finish the bottom edge of the bag. Do so with a zigzag stitch or a serger just like before.
Thread it with a piece of foldover elastic. Tie off the elastic and you’re done.
Other ways to mix up a diy drawstring bag
Use this tutorial to make your own drawstring bags, but you don’t have to limit yourselves to using just cotton fabrics. Here’s a couple fun ways to make your diy drawstring bags a little more interesting:
- Make a drawstring bag in velvet for a fancy bag for wine bottles
- Print your own blockprinted fabric for customizable party bags or board game accessory bags
- Make a drawstring bag in mesh for a pool bag
- Cut your bag any size you need
So that’s how easy it is to make a drawstring bag. It’s a great anytime project. I know I’m looking forward to being able to bake a batch of cookies and drop them off at friends’ houses inside a cute bag! How will you use yours?
How to make a drawstring bag
Drawstring bags are such an easy sewing project for beginners. Learn how to make a drawstring bag with this simple drawstring bag tutorial. This might be the most versatile thing a beginner sewer can make!
Materials
- cotton fabric
- ribbon/twill tape
Tools
- scissors
- elastic threader
- ruler
- fabric marker
Instructions
- Use a ruler and fabric marker to draw 2 rectangles from your chosen fabric.
- You can cut diy drawstring bags any size, but here's some basic sizes to get you started: 2"x3", 5"x8", 8"x10", 9"x11"
- Put the fabric right sides together and sew down one long side. Finish the seam with a zigzag stitch or serger.
- Foldover the top by 1/4", press, then 3/4" and press.
- Make a clip right at the bottom of the fold on both sides. Fold this little bit of fabric to the side and stitch with a zigzag stitch.
- Stitch close to the pressed fold across the top.
- Fold the bag right sides together and stitch down the other side starting at the clips and across the bottom. Finish these seams with a zigzag stitch or serger.
- Turn the bag right side out. Press the bag.
- Thread an elastic threader through the casing at the top, then pull ribbon through to finish your DIY drawstring bag.
- That's how easy it is to sew a drawstring bag!
Notes
Recommended Products
As an Amazon Associate and member of other affiliate programs, I earn from qualifying purchases.


Elizabeth Farr is the writer behind the Elizabeth Made This blog where she shares helpful sewing tips, step by step sewing tutorials and videos to help you explore your creativity through sewing. She has written sewing Eguides and patterns, been a featured teacher at Rebecca Page’s Sewing Summit and Jennifer Maker’s Holiday Maker Fest and her work has appeared in Seamwork and Altered Couture magazines. She also created a line of refashioned garments for SEWN Denver. When her sewing machine isn’t humming, she’s playing and teaching violin, and hanging around a good strategic board game with her husband and 4 kids.