

Today we’re talking about the block printing supplies you need if you want to give making your own DIY fabric a go.
I’ve been adding paint to fabric in one way or another since I was a kid, and now that I sew, there is a real joy in being able to sew with the fabric that you printed with your own two hands. And when you have your own fabric to work with, here’s 5 ways to love your handprinted fabric.
Block printing is my first real love when it comes to making your own fabric, and the good news is that it’s really fun and you need very little space to make it happen. I’ve been known to print on my freezer in the garage!
So let’s talk about the tools you need to start block printing from things that you might already have to the essentials that’ll get you ready to start printing your own fabric. Here we go!

elizabethmadethis.com is a participant in the Amazon Services LLC Associates Program, an affiliate advertising program designed to provide a way for websites to earn advertising revenues by advertising and linking toSome of the links below are affiliate links. This means that, at zero cost to you, I will earn an affiliate commission if you click through the link and finalize a purchase.
Table of Contents
Blocks for carving
You can’t block print without a block! There’s several different types of blocks from various materials that work well for blockprinting. Here are some block choices from beginner up to more advanced.
No carve options for block printing newbies
Traditional stamps

Believe it or not, a regular stamp for papercrafting can be a part of your block printing supplies arsenal. I used this cute dress stamp for this shirt dress from shirts. If you’re not ready to carve your own stamp, by all means, grab your old stamps and experiment!
Foam stickers
If carving tools scare you, you can take good old foam stickers from any craft department and stick them onto some kind of flat surface. A plastic plate or a piece of plexiglas will do. This won’t be the sturdiest option for blockprinting, but it’s a way to get your feet wet.

Dig through your cabinets or recycle bin. I used a plastic tray from a foil cake container for this “block”. This is a no-carve option for kids. I’ve had this art stylus since junior high art, but you can use any kind of pokey tool to add some texture to your shapes.

Blocks to carve
Pink school erasers
I’m serious. When I was bored in 4th grade, one of my friends and I would make little stamps out of pink school erasers using the business end of a mechanical pencil with the lead taken out as a carving tool. I have lots of happy faces and stars on my papers made with stamps from that era!

4th grade boredom aside, pink school erasers are really easy to carve, and they’re pretty sturdy. Use them for smaller detail blocks or just to get used to carving. Or, buy a jumbo pink eraser (*affiliate) and carve it up. This is block printing on the cheap!
This particular jumbo pink eraser gets carved up into a simple border stamp this block printing basics tutorial.
Speedball blocks for blockprinting
Speedball makes several different types of blocks, all rubberized materials, all very easy to work with. The bigger the block, the more you’ll pay, but large blocks can be cut down to the size that you need.
Speedy Cut Easy blocks

These are the blue Speedball blocks (*affiliate). They’re inexpensive, but I’ve had issues with them crumbling in the past.
Speedy Cut Blocks and Speedy Carve blocks
The Speedy Cut blocks (*affiliate) are the off-white Speedball blocks. These are a little nicer than the blue, and still pretty inexpensive. I like these especially if they’re mounted onto wood. I’ve had large blocks split on me, but the mounted blocks do really well.
The Speedy Carve blocks (*affiliate) are the pink Speedball blocks. These are lovely to work with. You can get a lot of good detail, they wash up well, and the ink sticks to the surface in a way that gives you a good print.

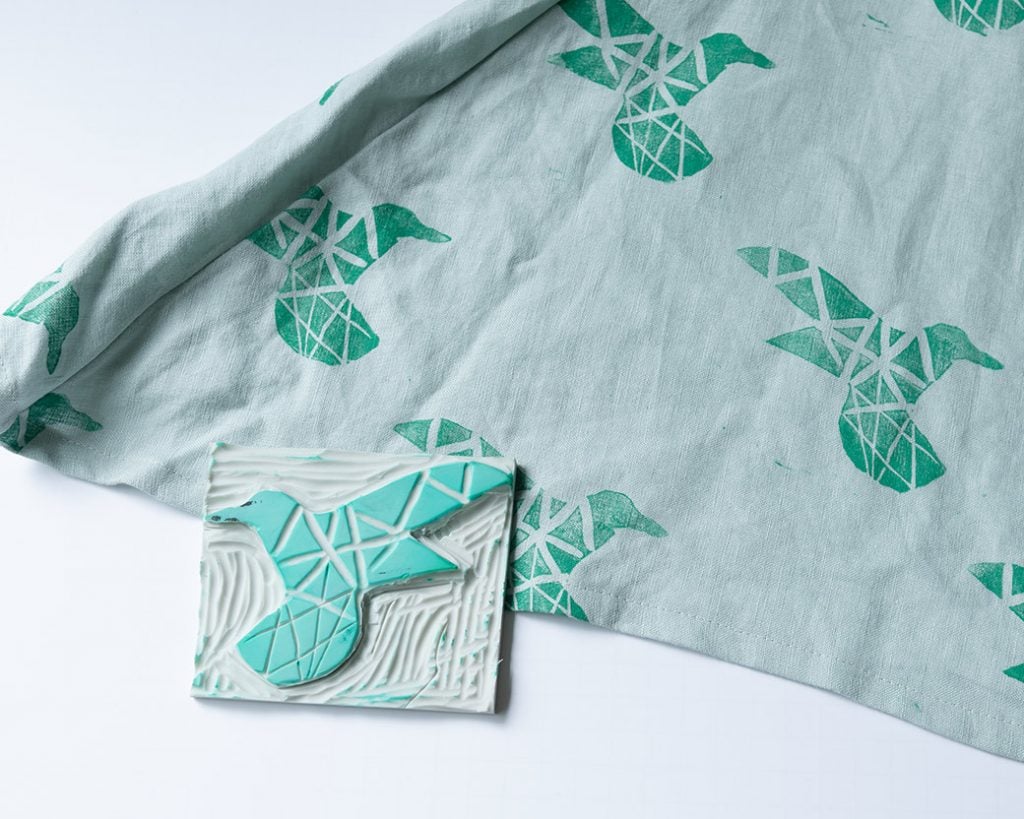
Moo Carve

Moo Carve blocks (*affiliate) are ah-ma-zing! Hands down these are my favorite blocks. The white rubbery surface is dense and extra smooth, so they resist crumbling. Plus, you can get a lot more detail in these blocks than you can from some of the other types of materials.
The only thing about Moo Carve is that I’ve only ever found them online. Not a big deal, but when you get the itch to blockprint, it’d be nice to go to a craft store and pick one up!
Linoleum
Linoleum blocks are for the brave. They’re tough and difficult to carve. You need SHARP tools for these. I’m not going to say that I’ve totally wounded myself cutting lineoleum blocks before, but I’ve totally wounded myself cutting linoleum before. The good thing about linoleum blocks is that they’re virtually indestructible and you can get very crisp details in them.
Linoleum is not my favorite for block printing on fabric. They really work best on paper. If you do use these on fabric, go light-handed on the ink. They’re thinner than the rubberized blocks, so too much ink can make for a muddy image.
That does it for blocks to carve. Let’s talk carving tools.


Elizabeth Farr is the writer behind the Elizabeth Made This blog where she shares helpful sewing tips, step by step sewing tutorials and videos to help you explore your creativity through sewing. She has written sewing Eguides and patterns, been a featured teacher at Rebecca Page’s Sewing Summit and Jennifer Maker’s Holiday Maker Fest and her work has appeared in Seamwork and Altered Couture magazines. She also created a line of refashioned garments for SEWN Denver. When her sewing machine isn’t humming, she’s playing and teaching violin, and hanging around a good strategic board game with her husband and 4 kids.
Hi Elizabeth – Thanks for this great round-up of supplies! I’ve been wondering about printing on fabric and you answered some of my questions. I’ve done some linoleum block printing on paper and I learned a trick from someone who took a printing class to make it easier: Iron your lino! Seriously! Warm it up with a hot iron, using a pressing cloth. Don’t leave the iron in one place, keep it moving or you’ll see the texture of your fabric show up on the surface of the lino. Reheat it as necessary while you’re carving. When you notice it getting a little harder to cut, it’s time to hit it with the iron again. It really does soften up the linoleum. That said, it’s not very deep so you can’t always get the definition you may need for printing on fabric. But if people find that they like the printing process, they shouldn’t be afraid of lino. Just get out your iron! and if you’re serious about printing, consider making or buying a bench hook, which is a handy “frame” for holding your block for you while you carve. It’ll help a lot with any printing block material, actually. (Google “lino bench hook” and you’ll see what I mean. Happy printing, and thanks for the scoop on materials for printing on fabric!